
Schedule a one-time or recurring transfer between your accounts.
Schedule a Recurring Transfer
Set it and forget it! Automate your payments or savings splits.
External Transfers
Transfer money to and from your account at another financial institution.
Member to Member Transfers
Transfer money to another FCCU member.
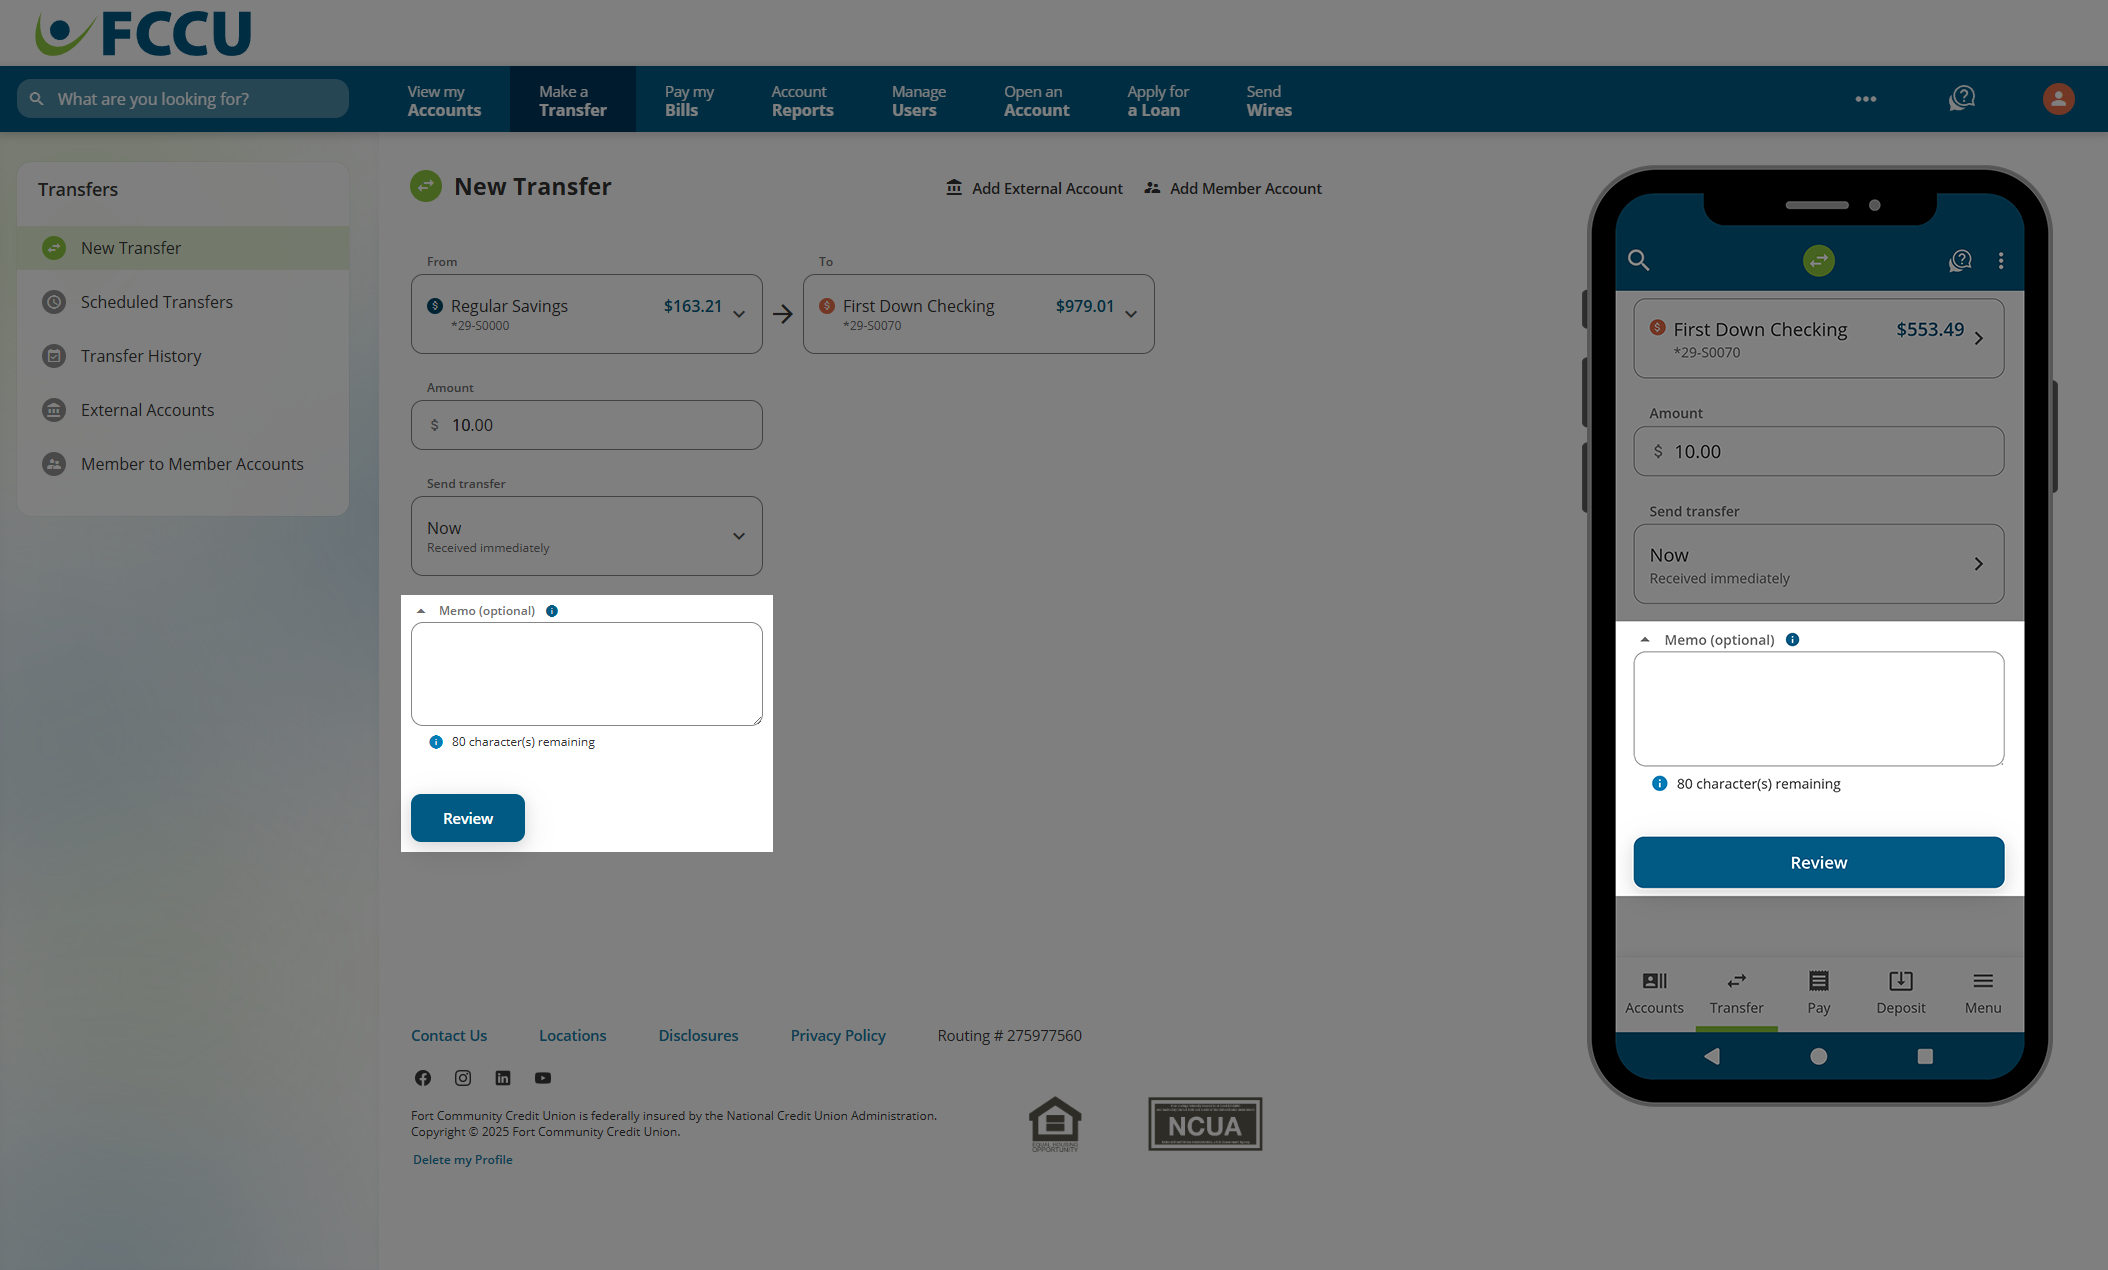
Transfer Between Your Accounts
Make a simple transfer between two of your accounts.
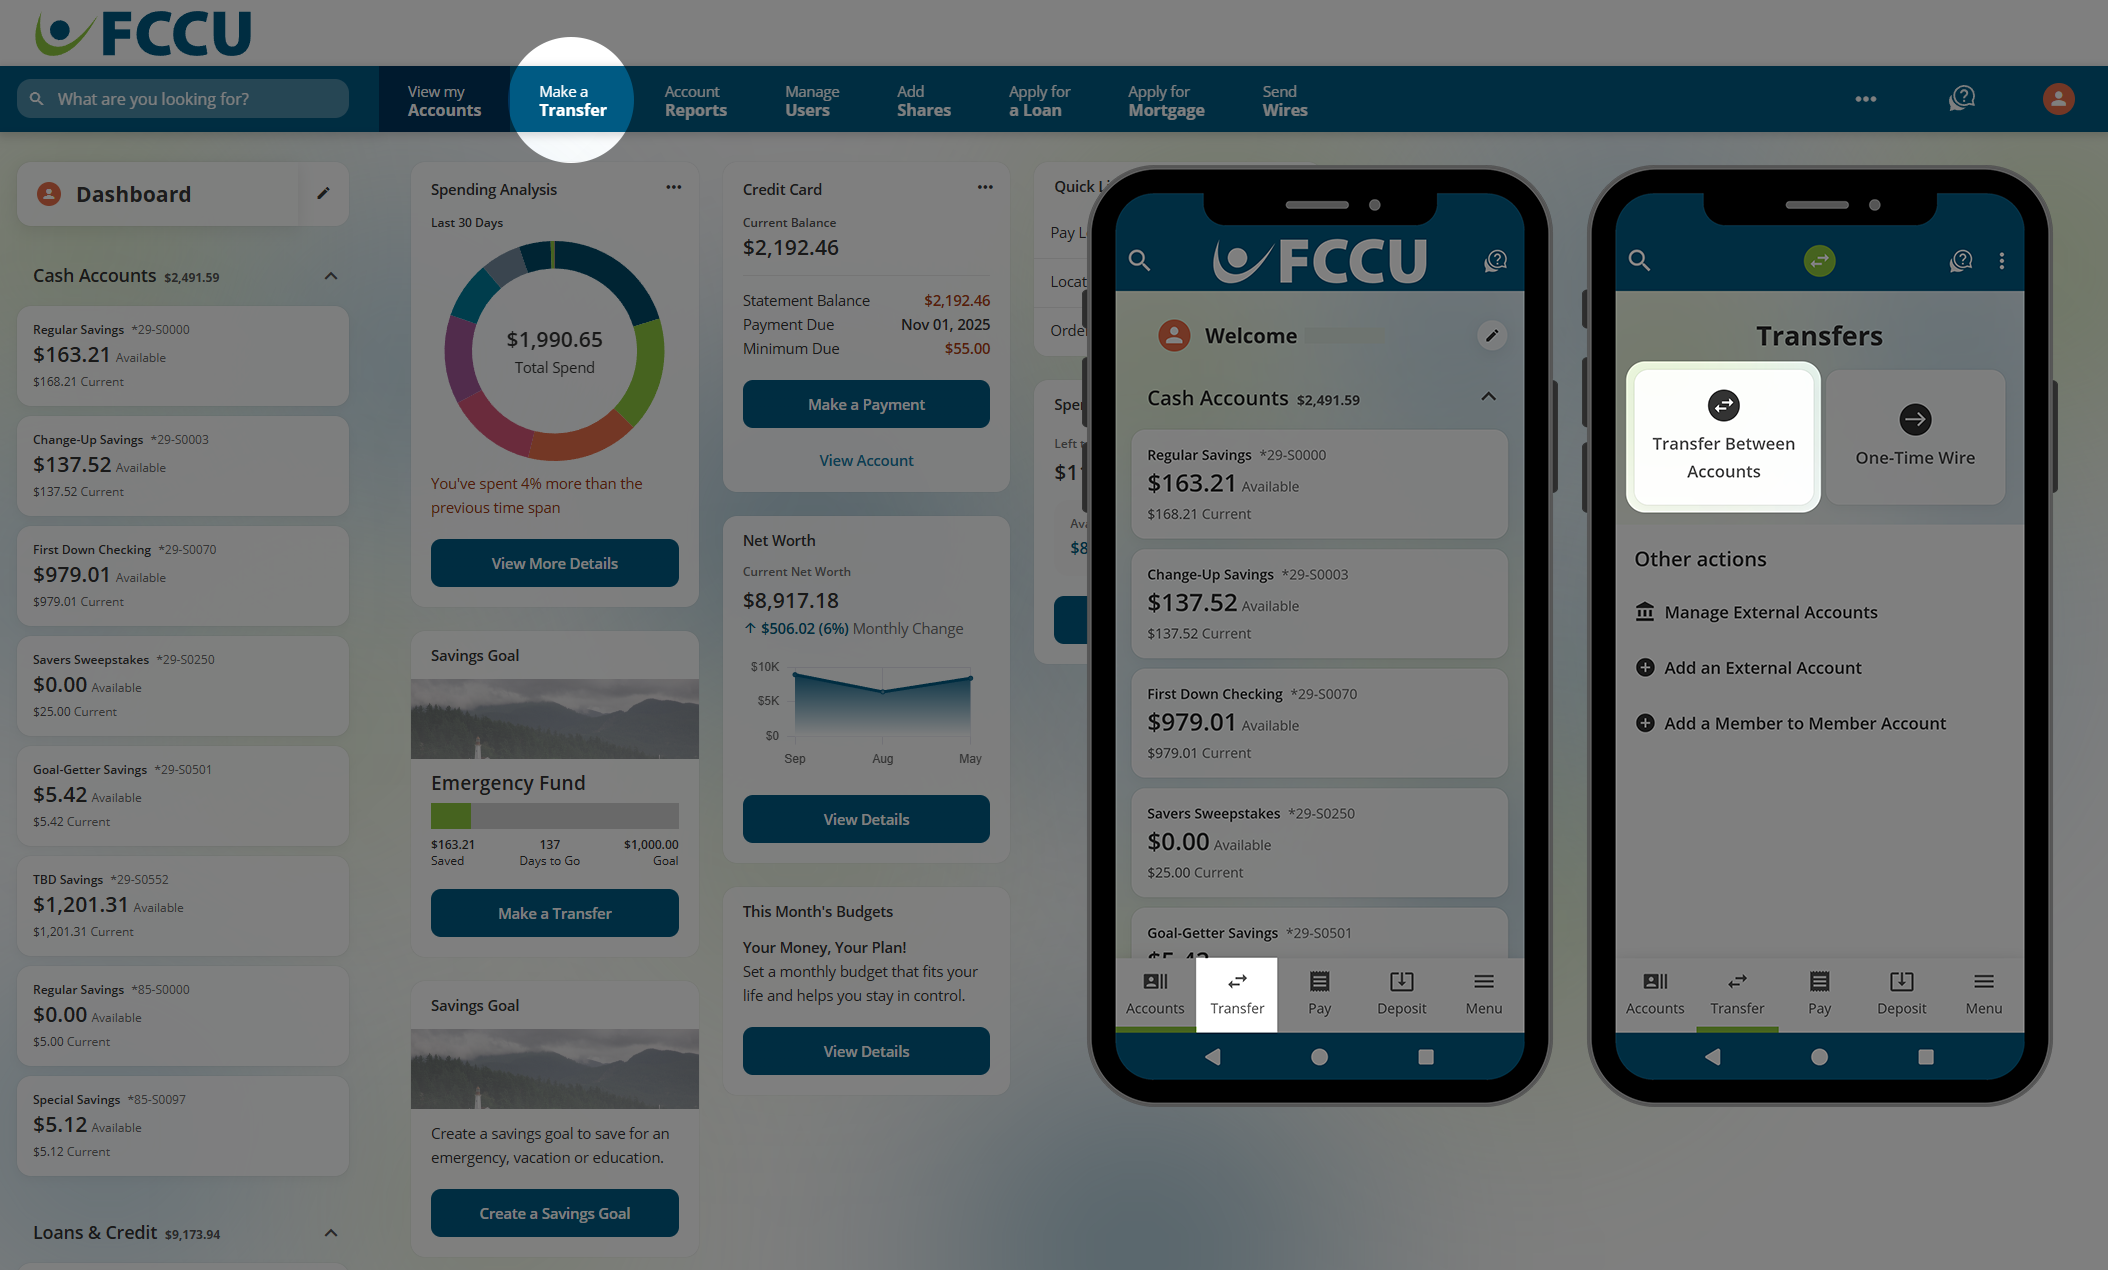
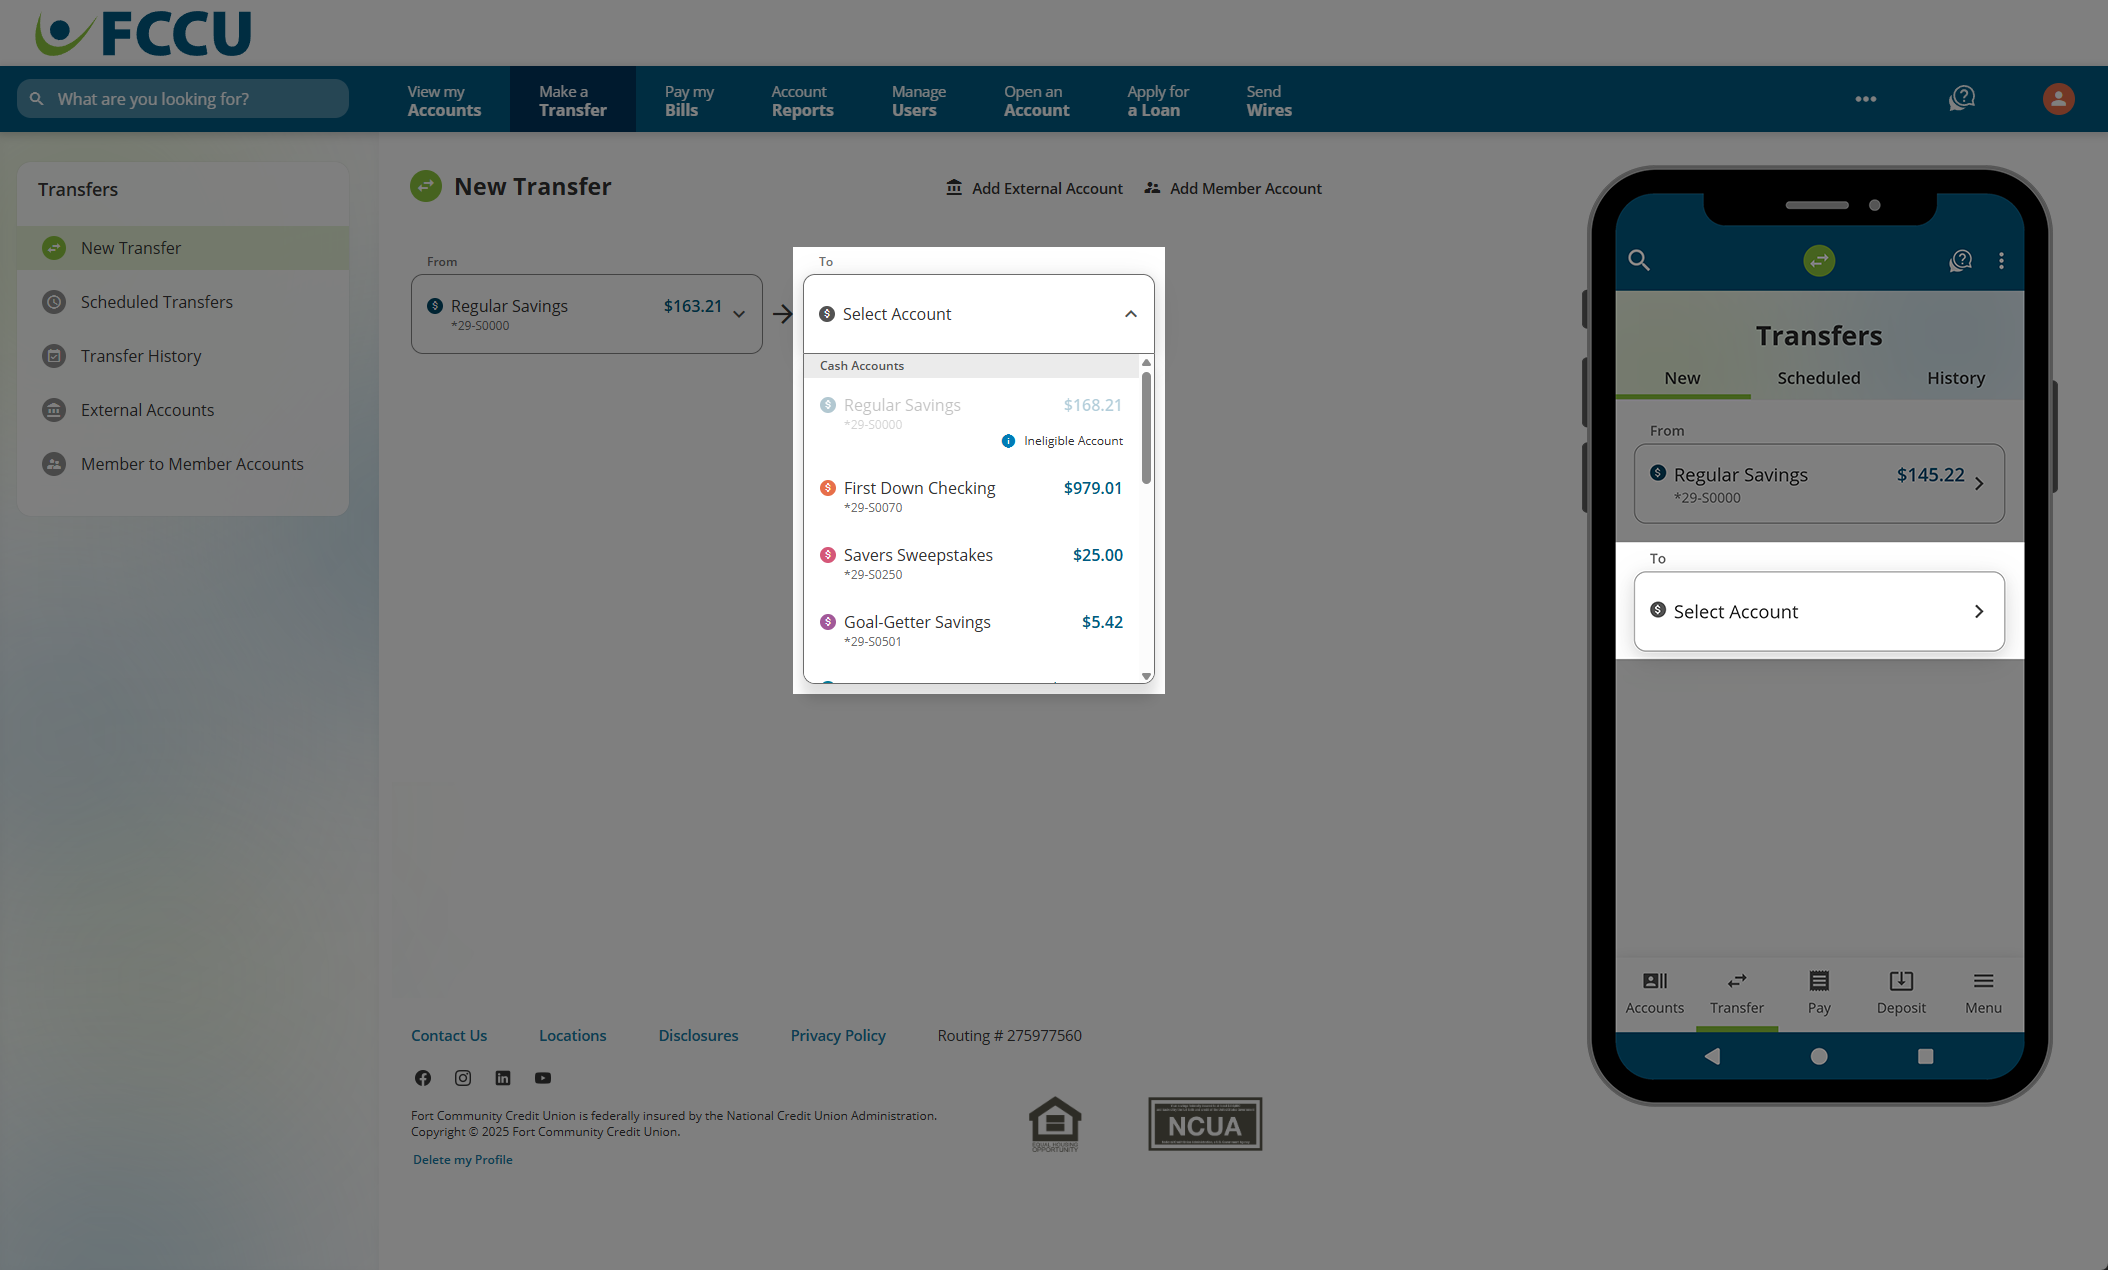
- From your account dashboard, click the Make a Transfer menu option. On the mobile app, tap the Transfer menu option, and then tap the Transfer Between Accounts button.
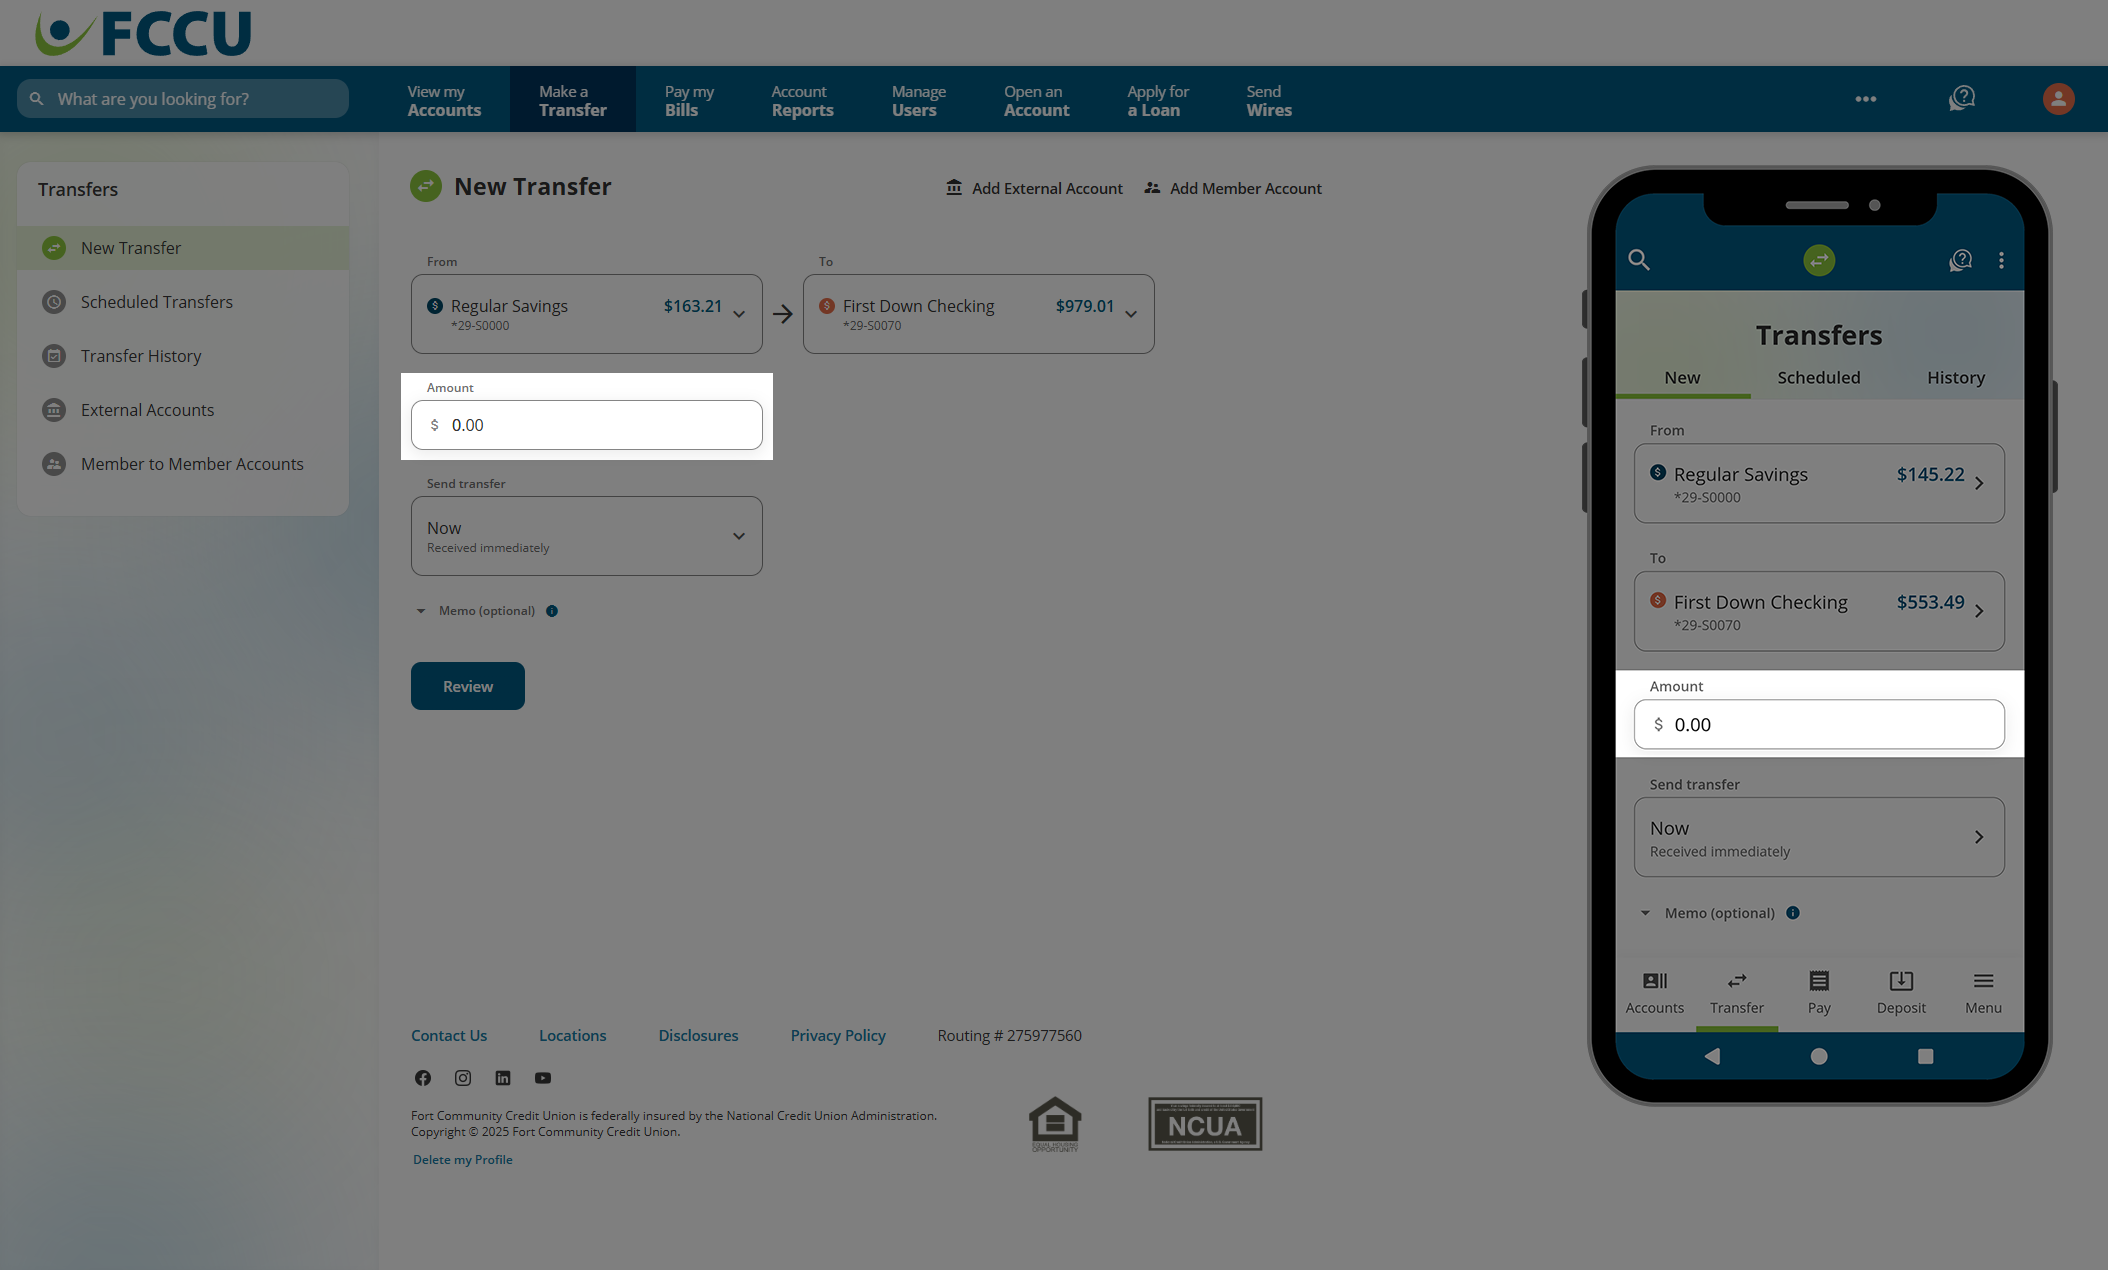
- In the From dropdown menu, click on the account you want to withdraw funds from.

- In the To dropdown menu, click on the account you want to transfer money to.

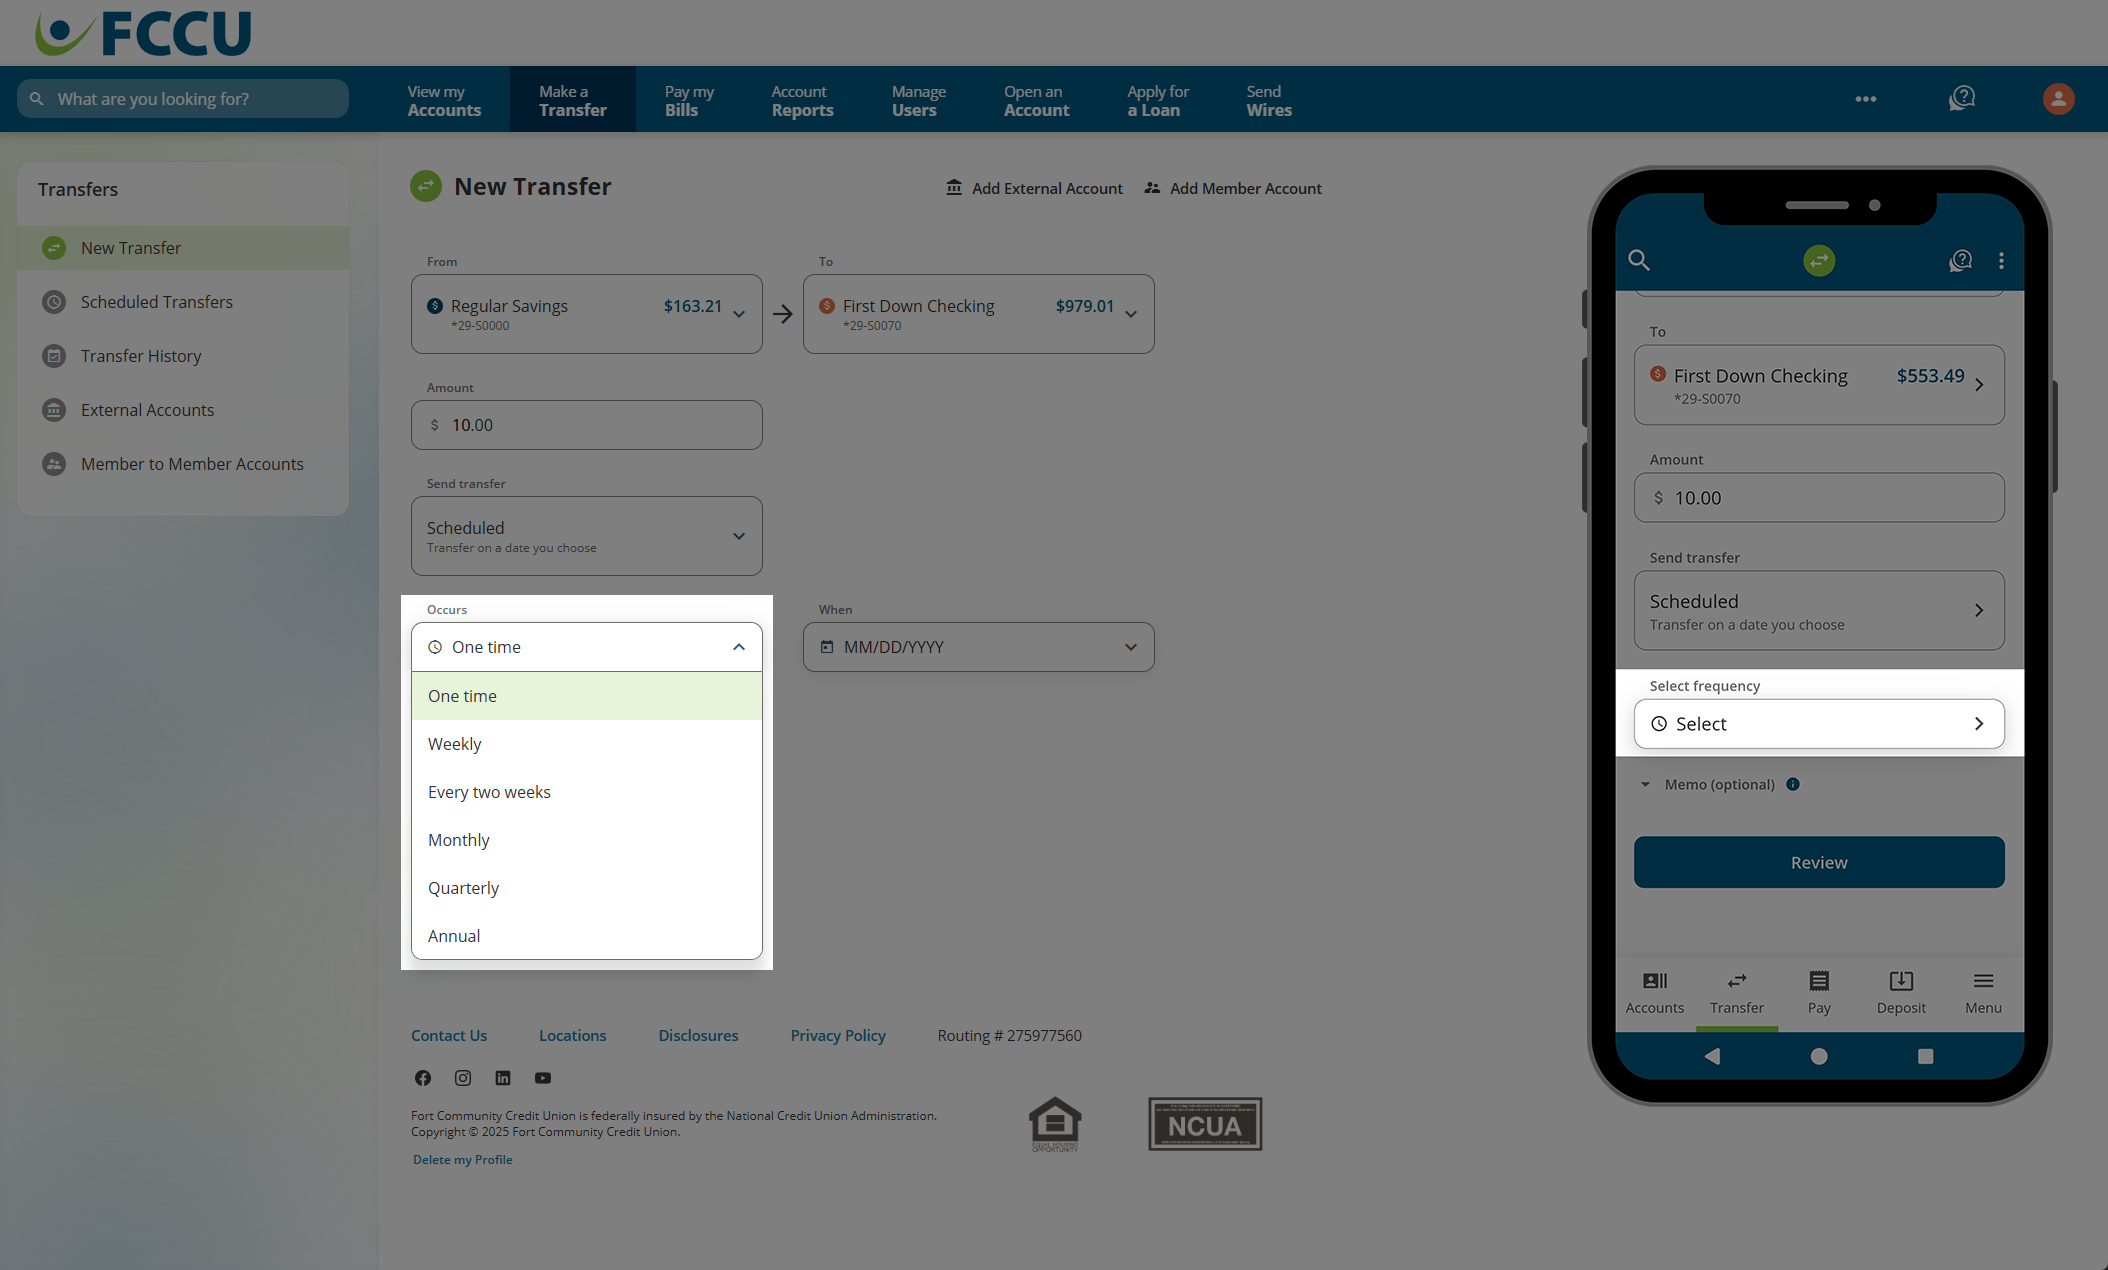
- In the Amount field, type in the amount you'd like to transfer.
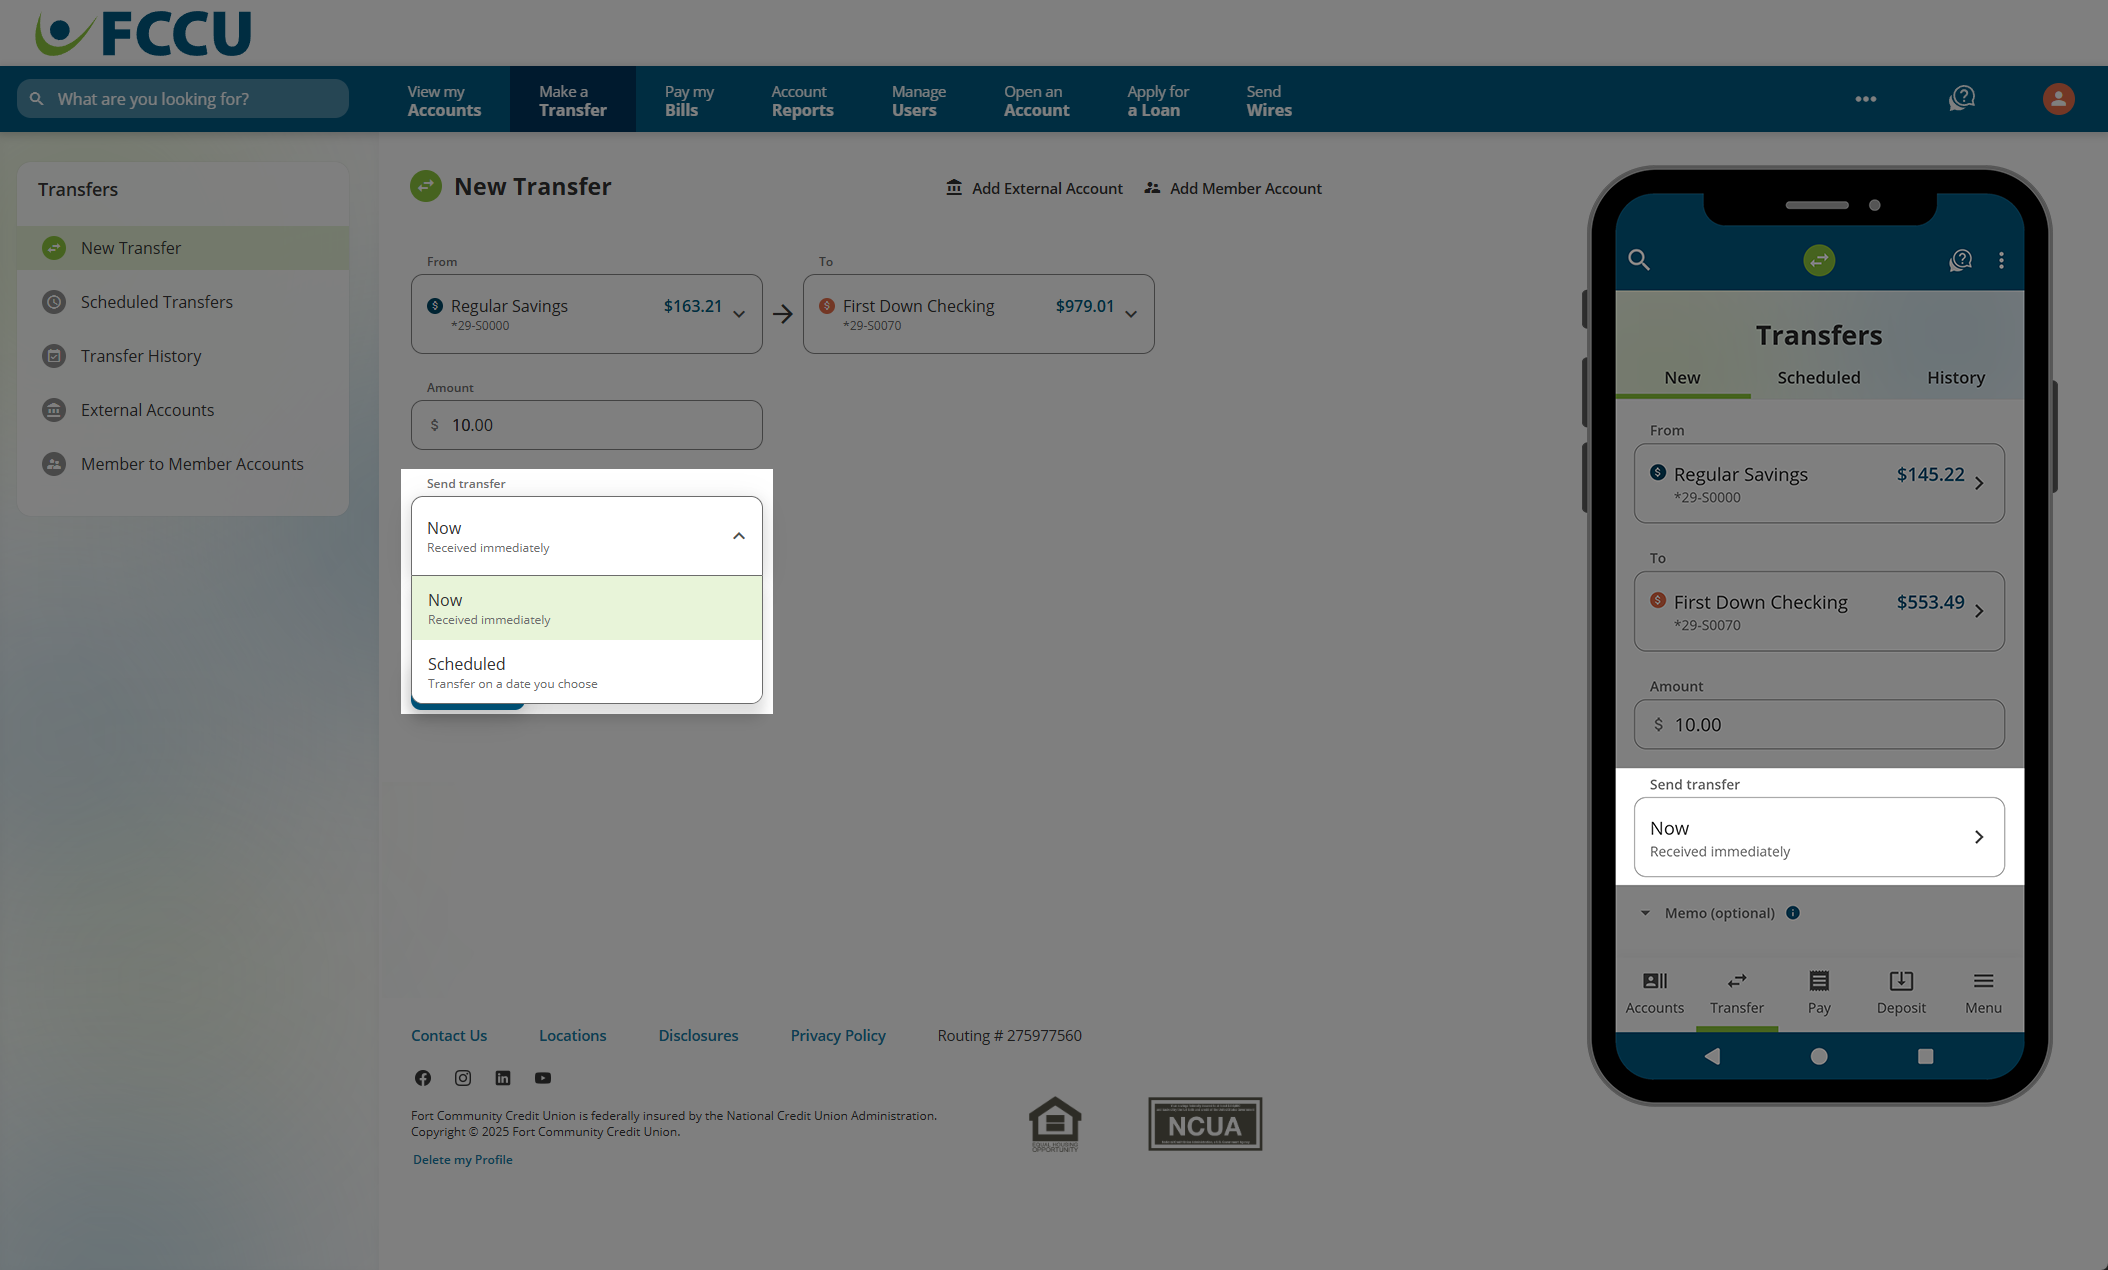
- In the Send Transfer dropdown menu...
- Select Now if you want this to be a one-time transfer sent immediately.
- Select Scheduled if you want this to be a scheduled/recurring transfer on a future date.
- Optional: Click the down arrow next to the Memo (optional) field to expand it and type in a description of the transfer (max 80 characters).
- Click the Review button.
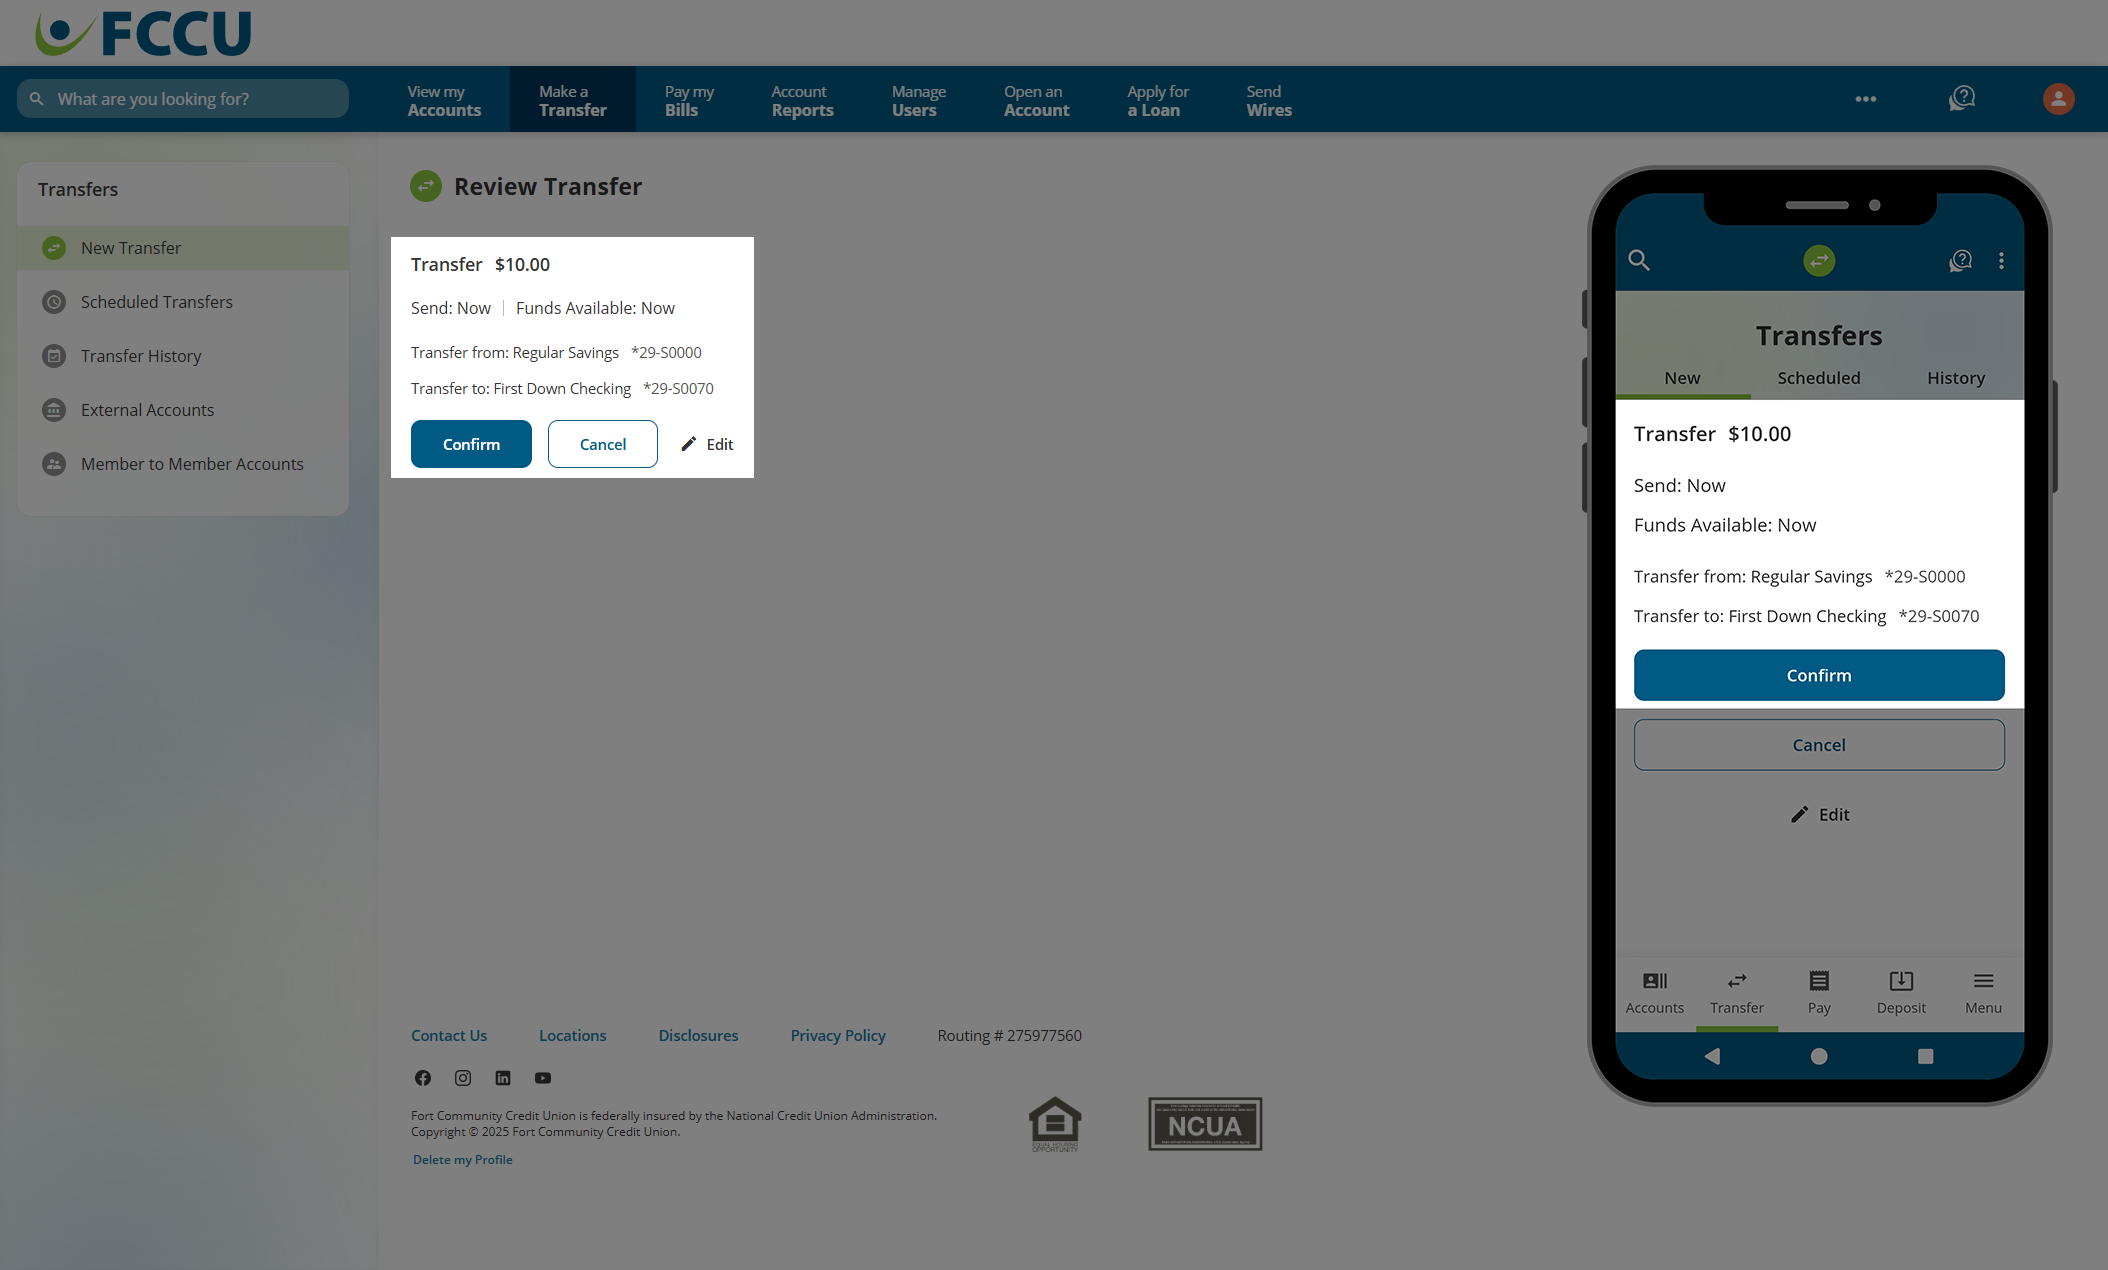
- Review the details of your transfer. If everything looks good, click the Confirm button.
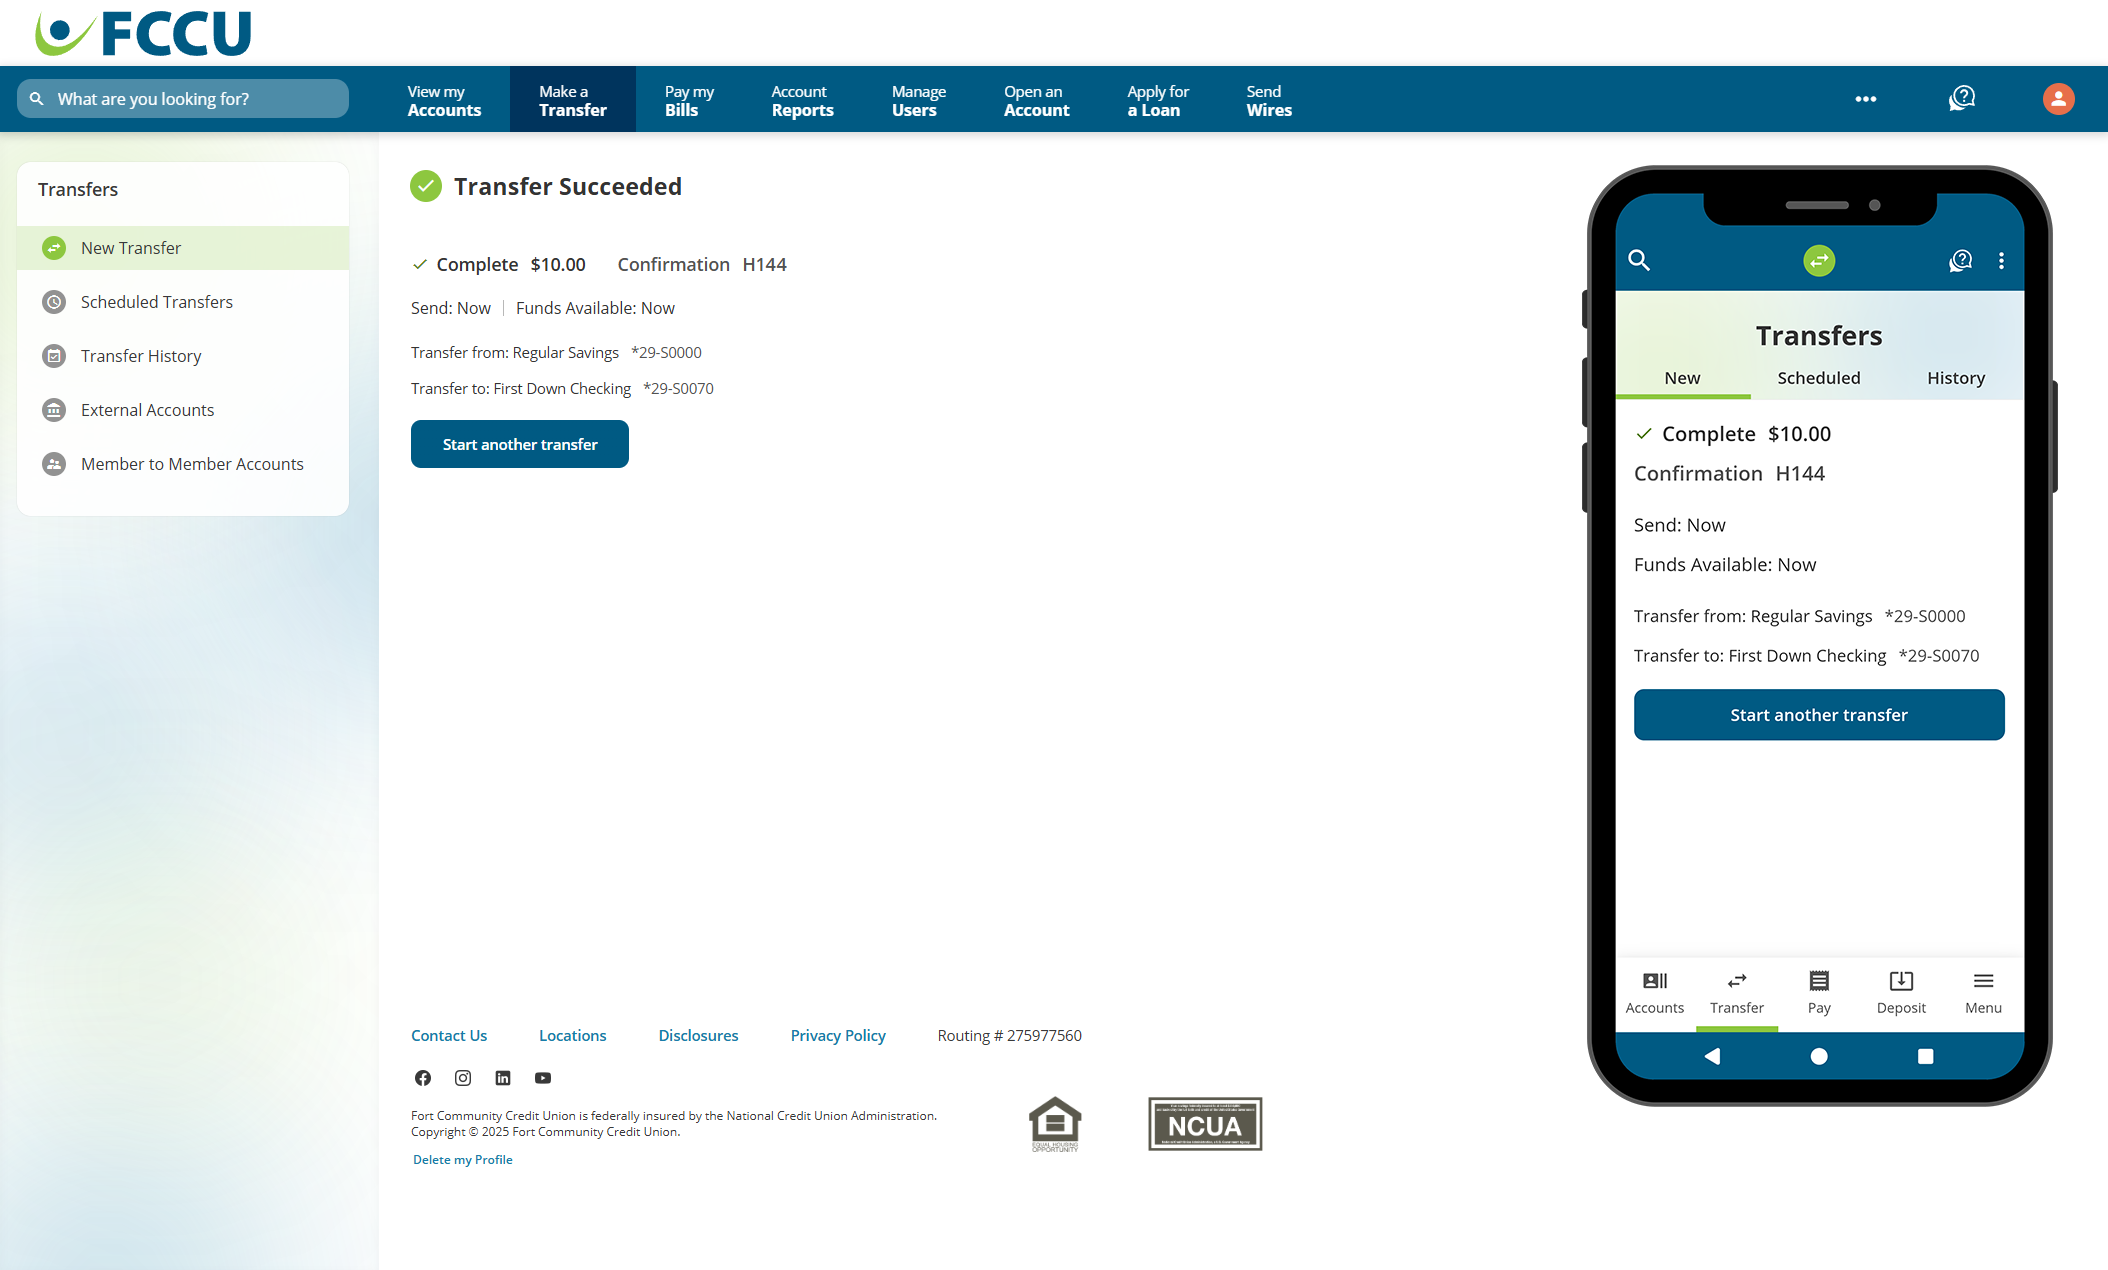
- Your transfer has now been posted! You will be redirected to a transfer confirmation page.

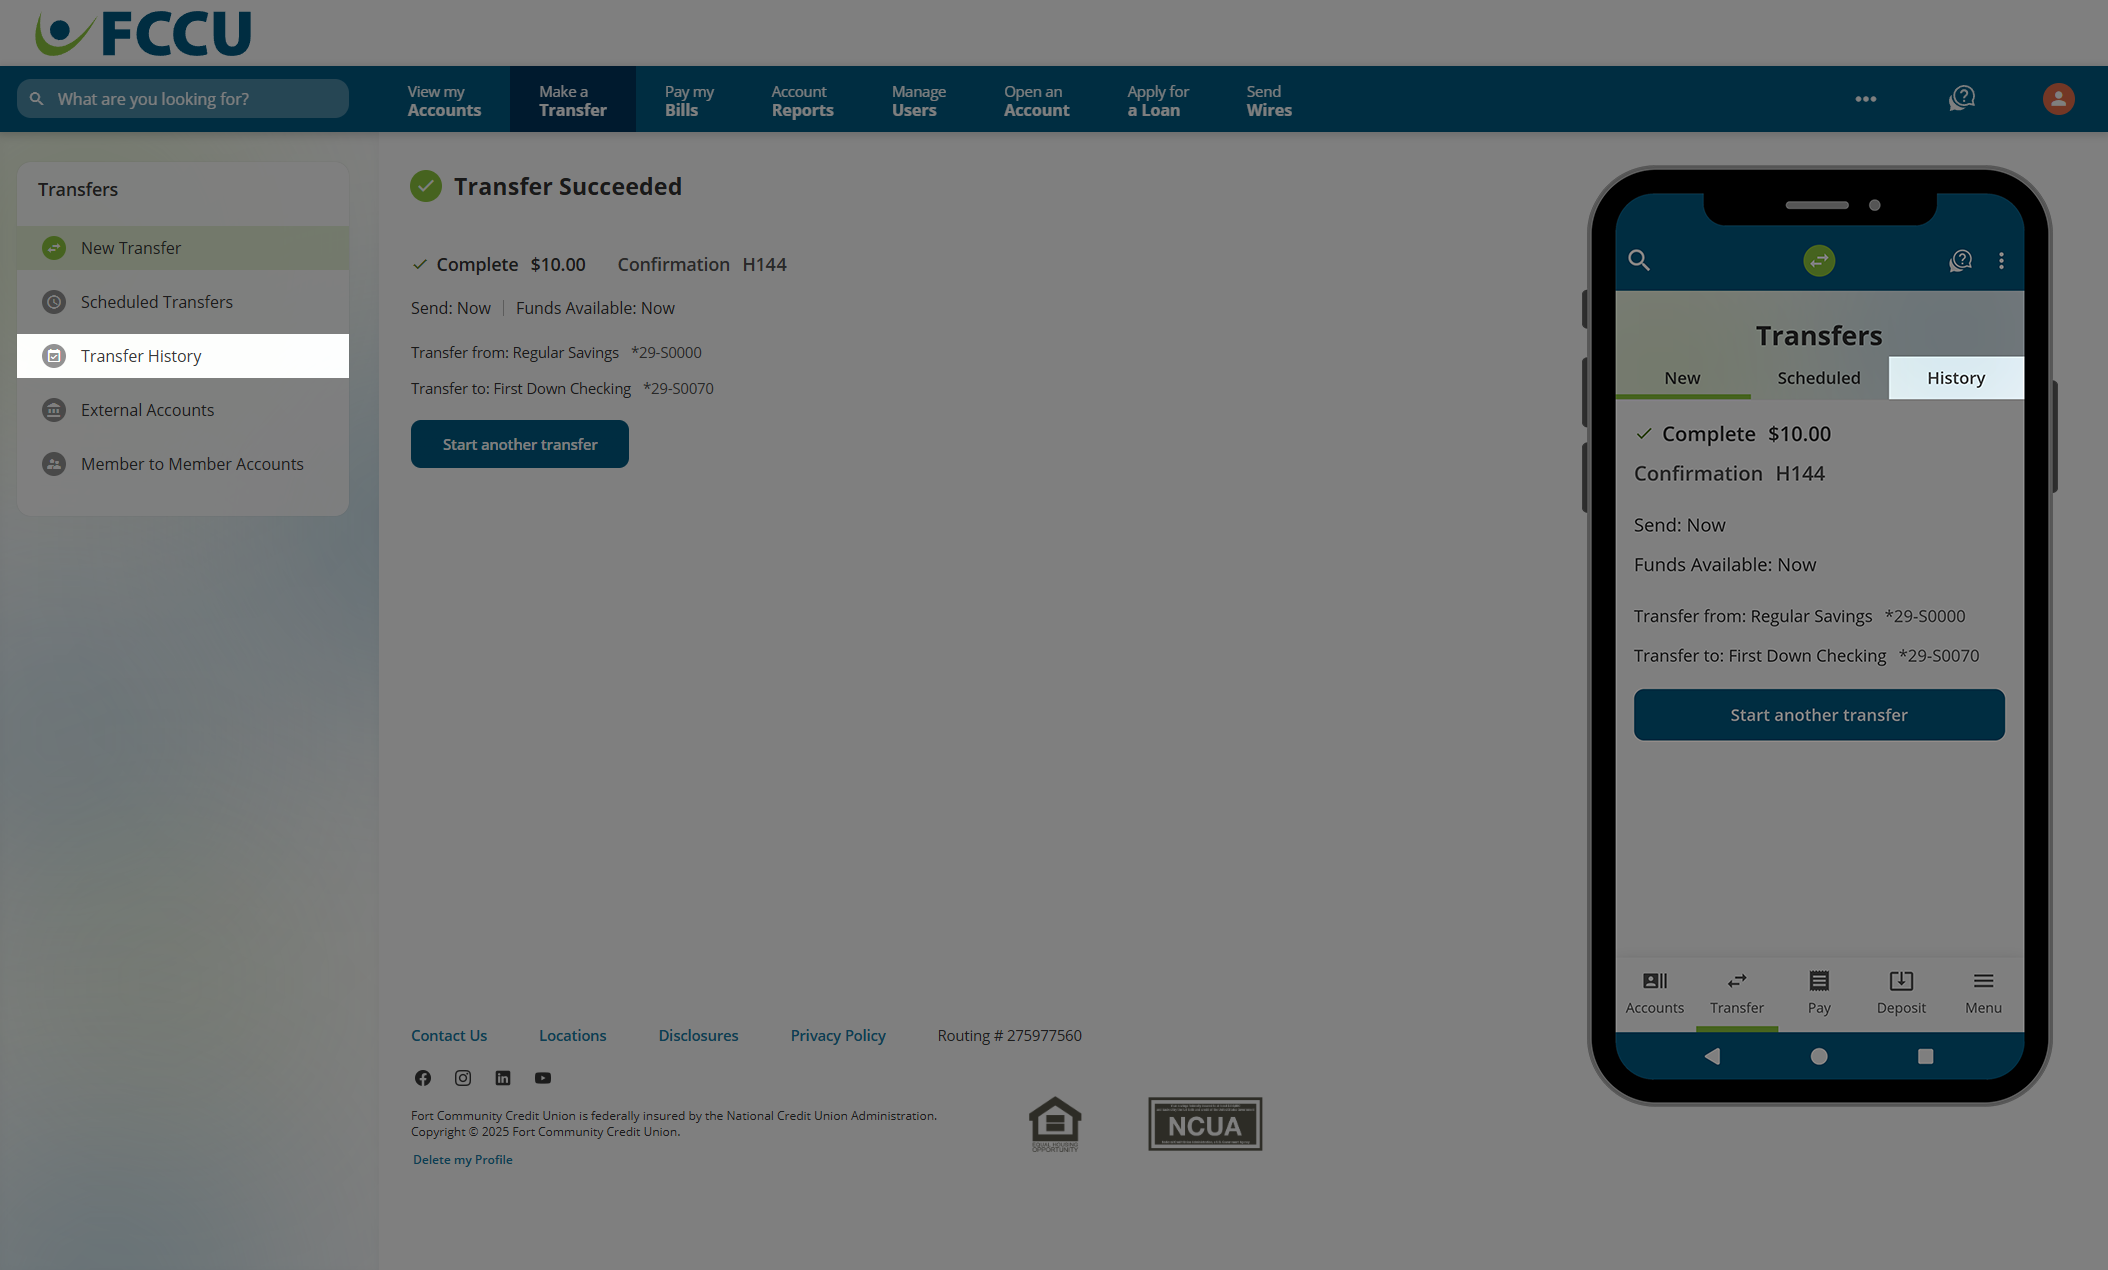
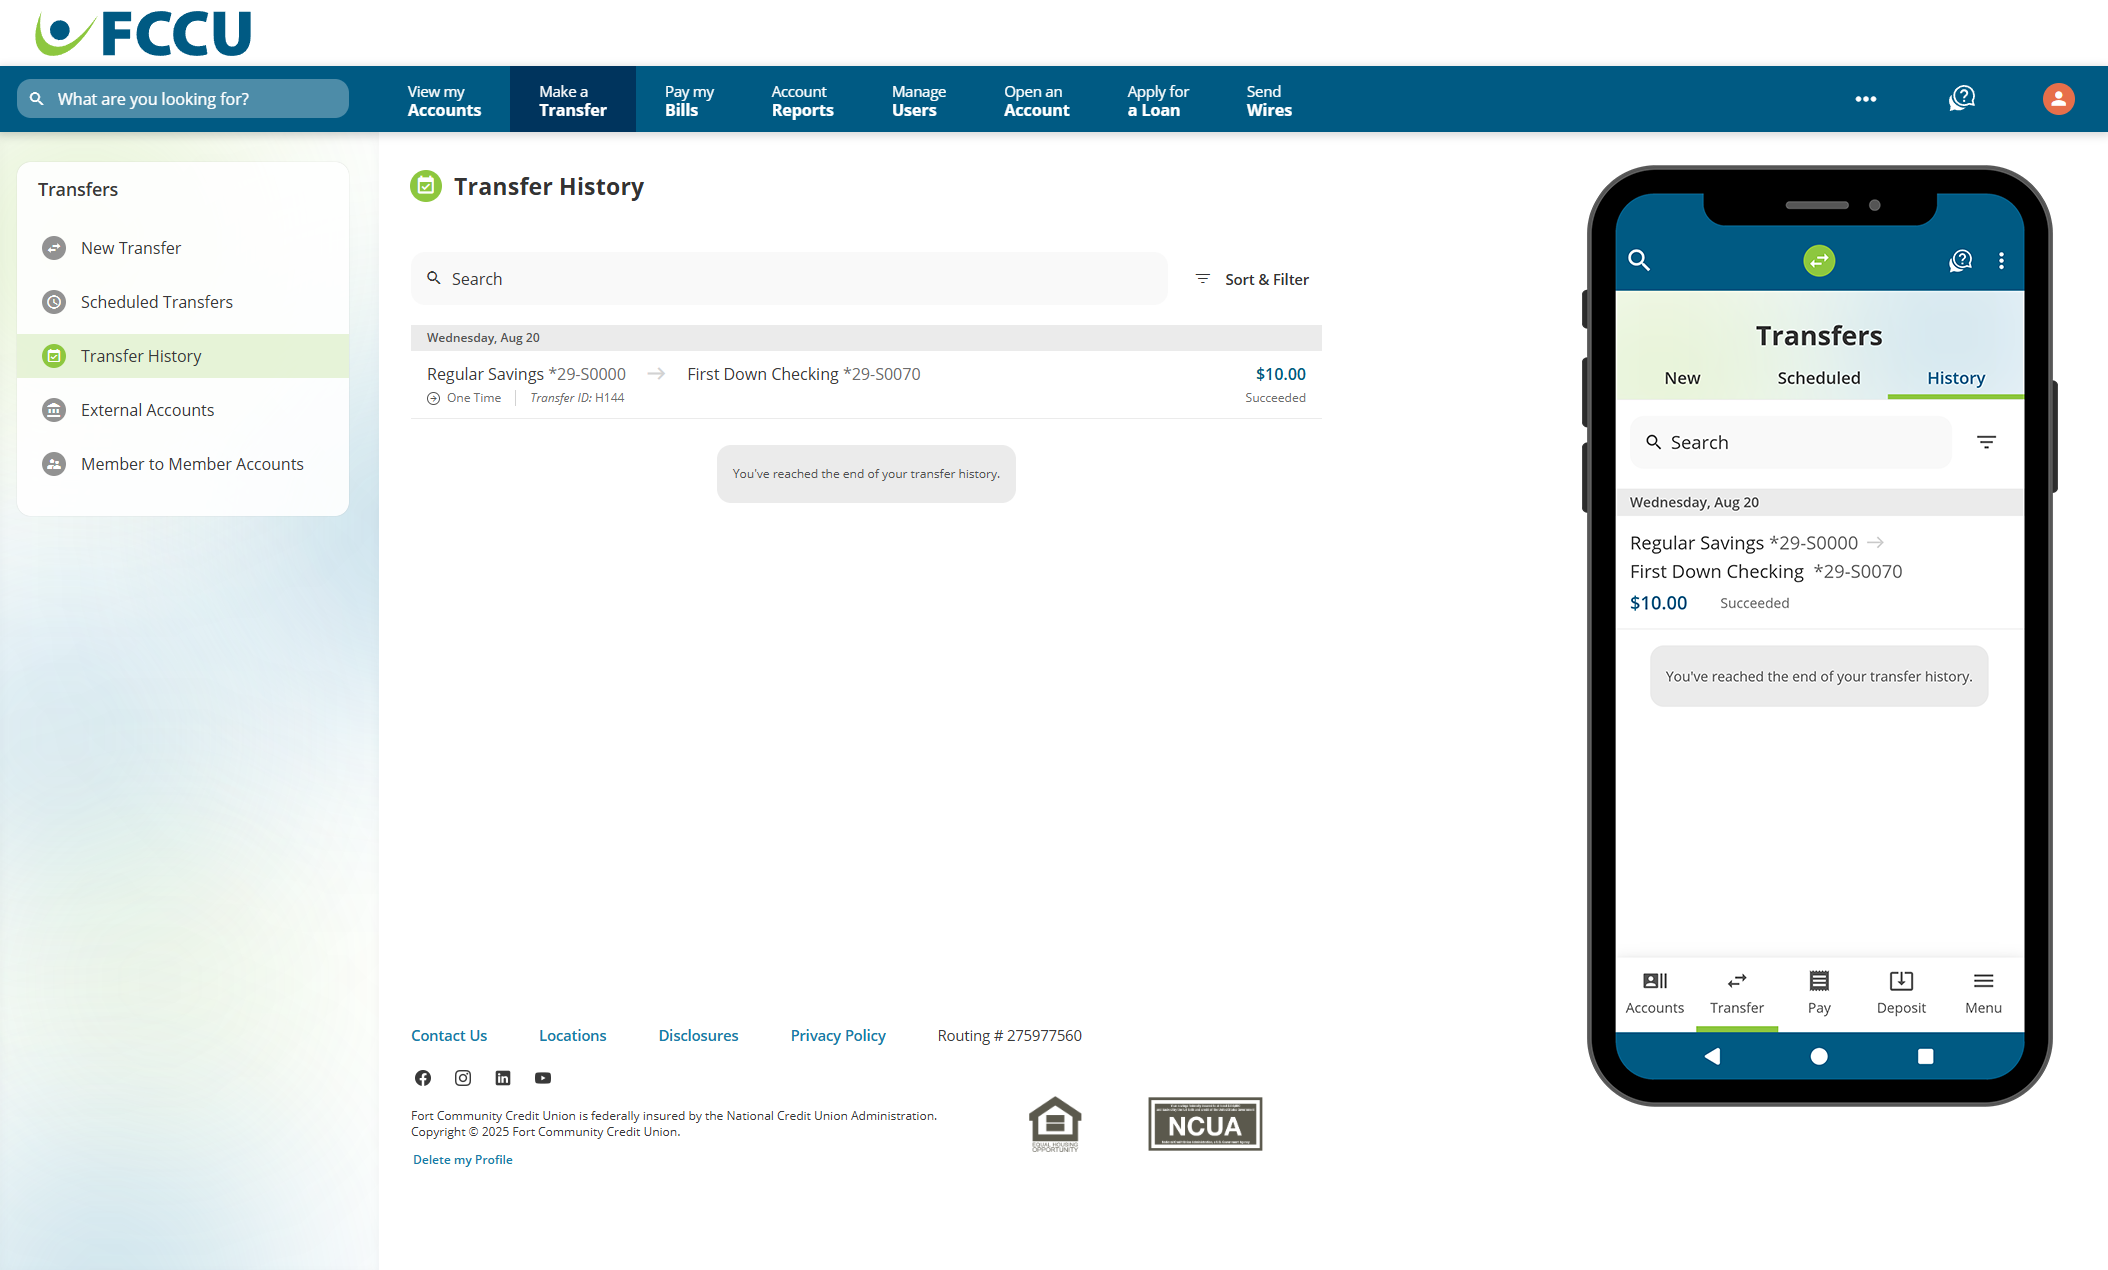
To view past transactions, click the Transfer History menu option. On the mobile app, tap the History tab.
Schedule a Recurring Transfer
Set it and forget it! Automate your payments or savings splits.
- From your account dashboard, click the Make a Transfer menu option. On the mobile app, tap the Transfer menu option, and then tap the Transfer Between Accounts button.
- In the From dropdown menu, click on the account you want to withdraw funds from.

- In the To dropdown menu, click on the account you want to transfer money to.
- In the Amount field, type in the amount you'd like to transfer.

- In the Send Transfer dropdown menu...
- Select Now if you want this to be a one-time transfer sent immediately.
- Select Scheduled if you want this to be a scheduled/recurring transfer on a future date.

- In the Occurs dropdown menu (Select frequency on mobile), choose how often you'd like this transfer to occur:
- One-Time
- Weekly
- Every two weeks
- Monthly
- Quarterly
- Annually
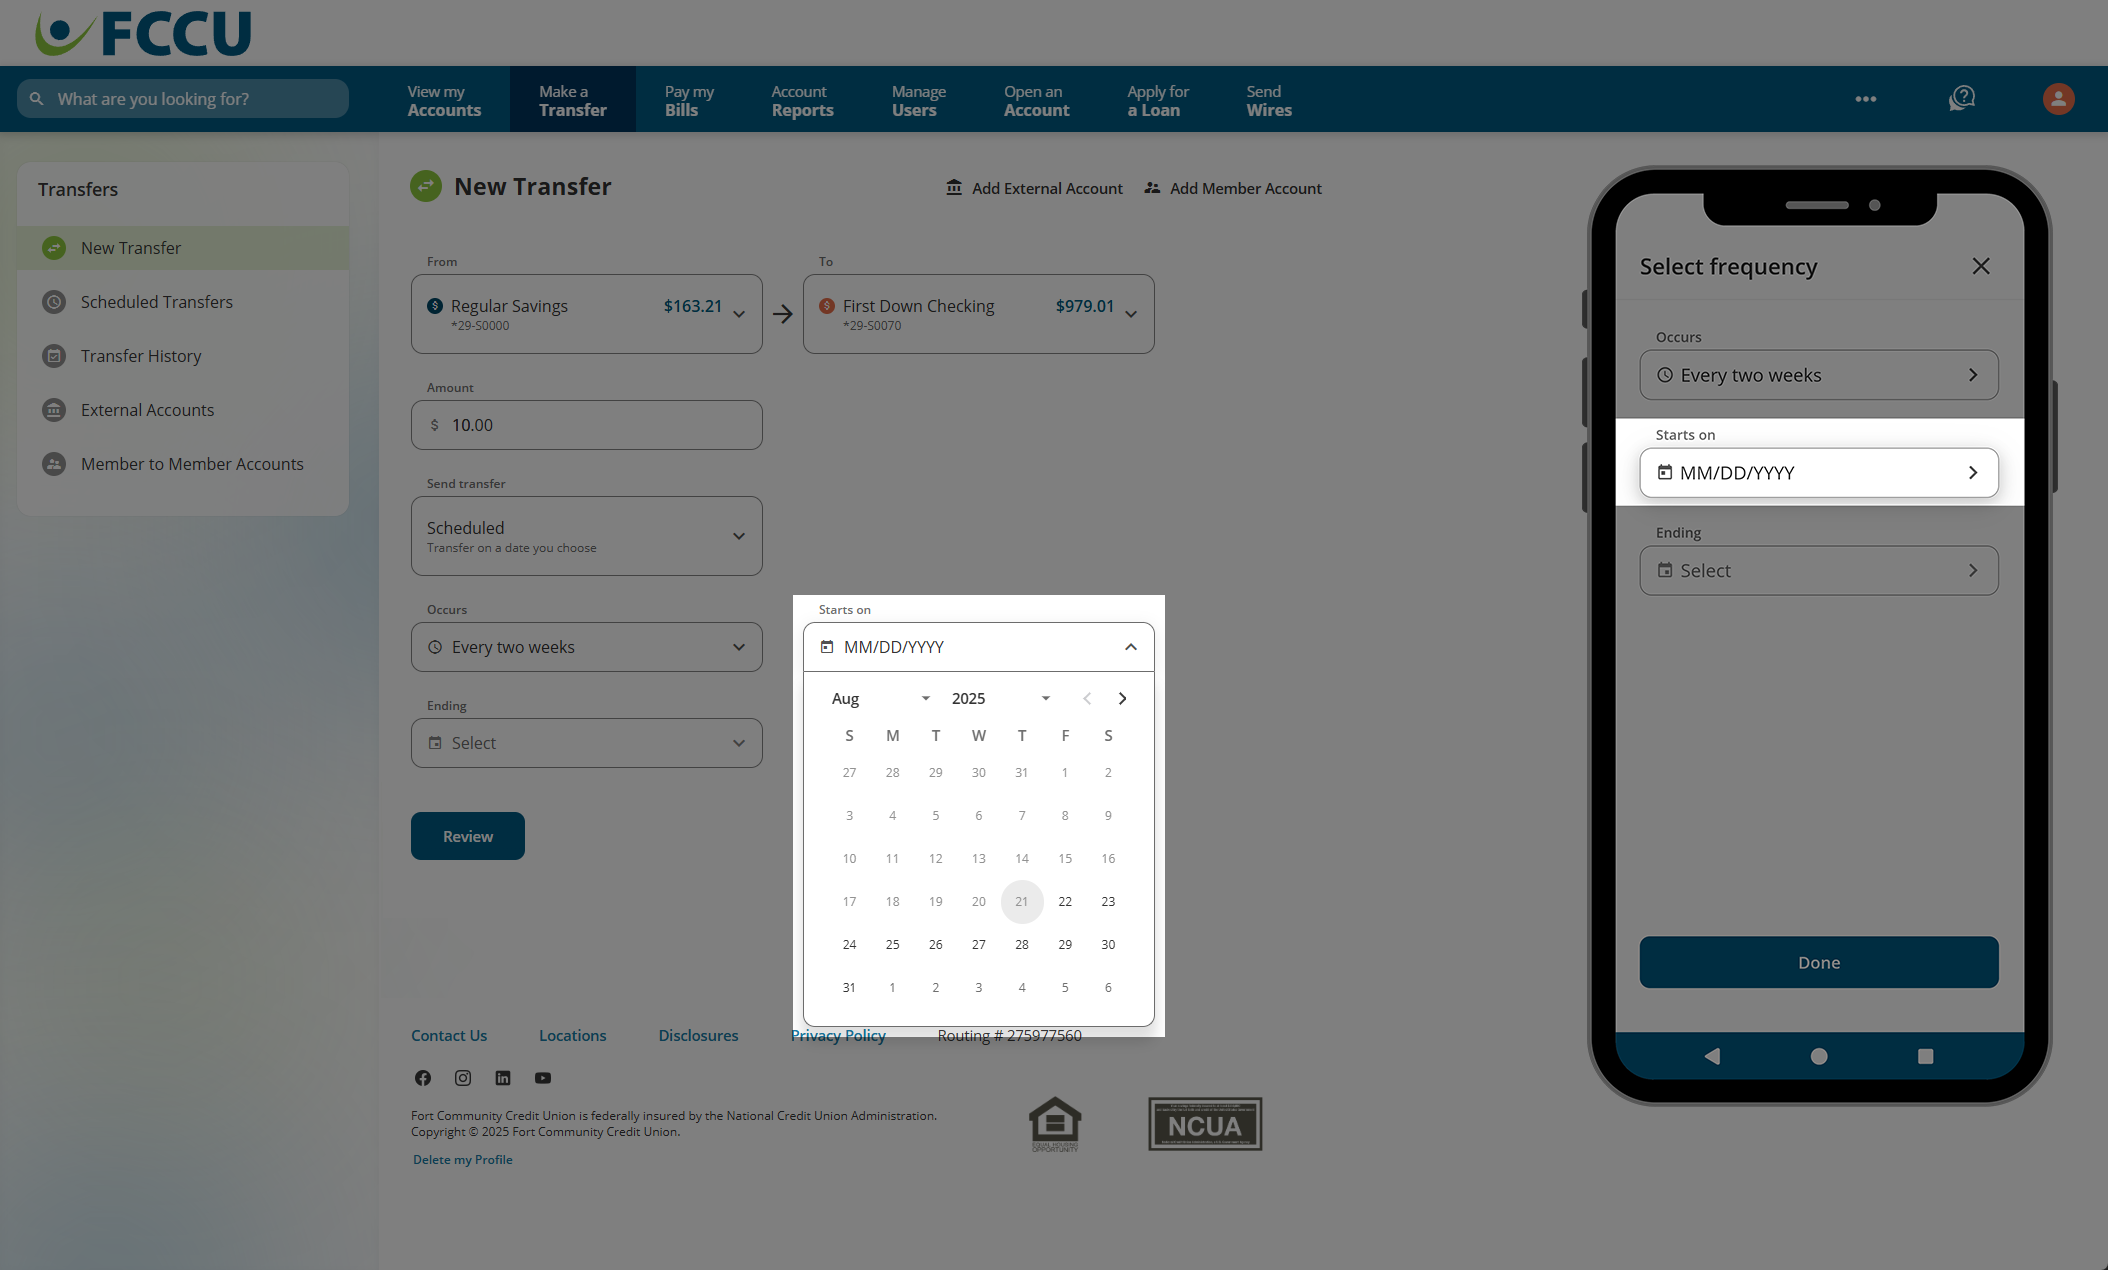
- Click the Starts on dropdown menu, and use the calendar to select your desired start date.
If you chose the One time menu option in the previous step, this dropdown menu will be labeled When.
- Click the When dropdown menu, and use the calendar to select your desired start date.
- If using the mobile app, tap the Done button.
- Skip to Step 9 ⇒
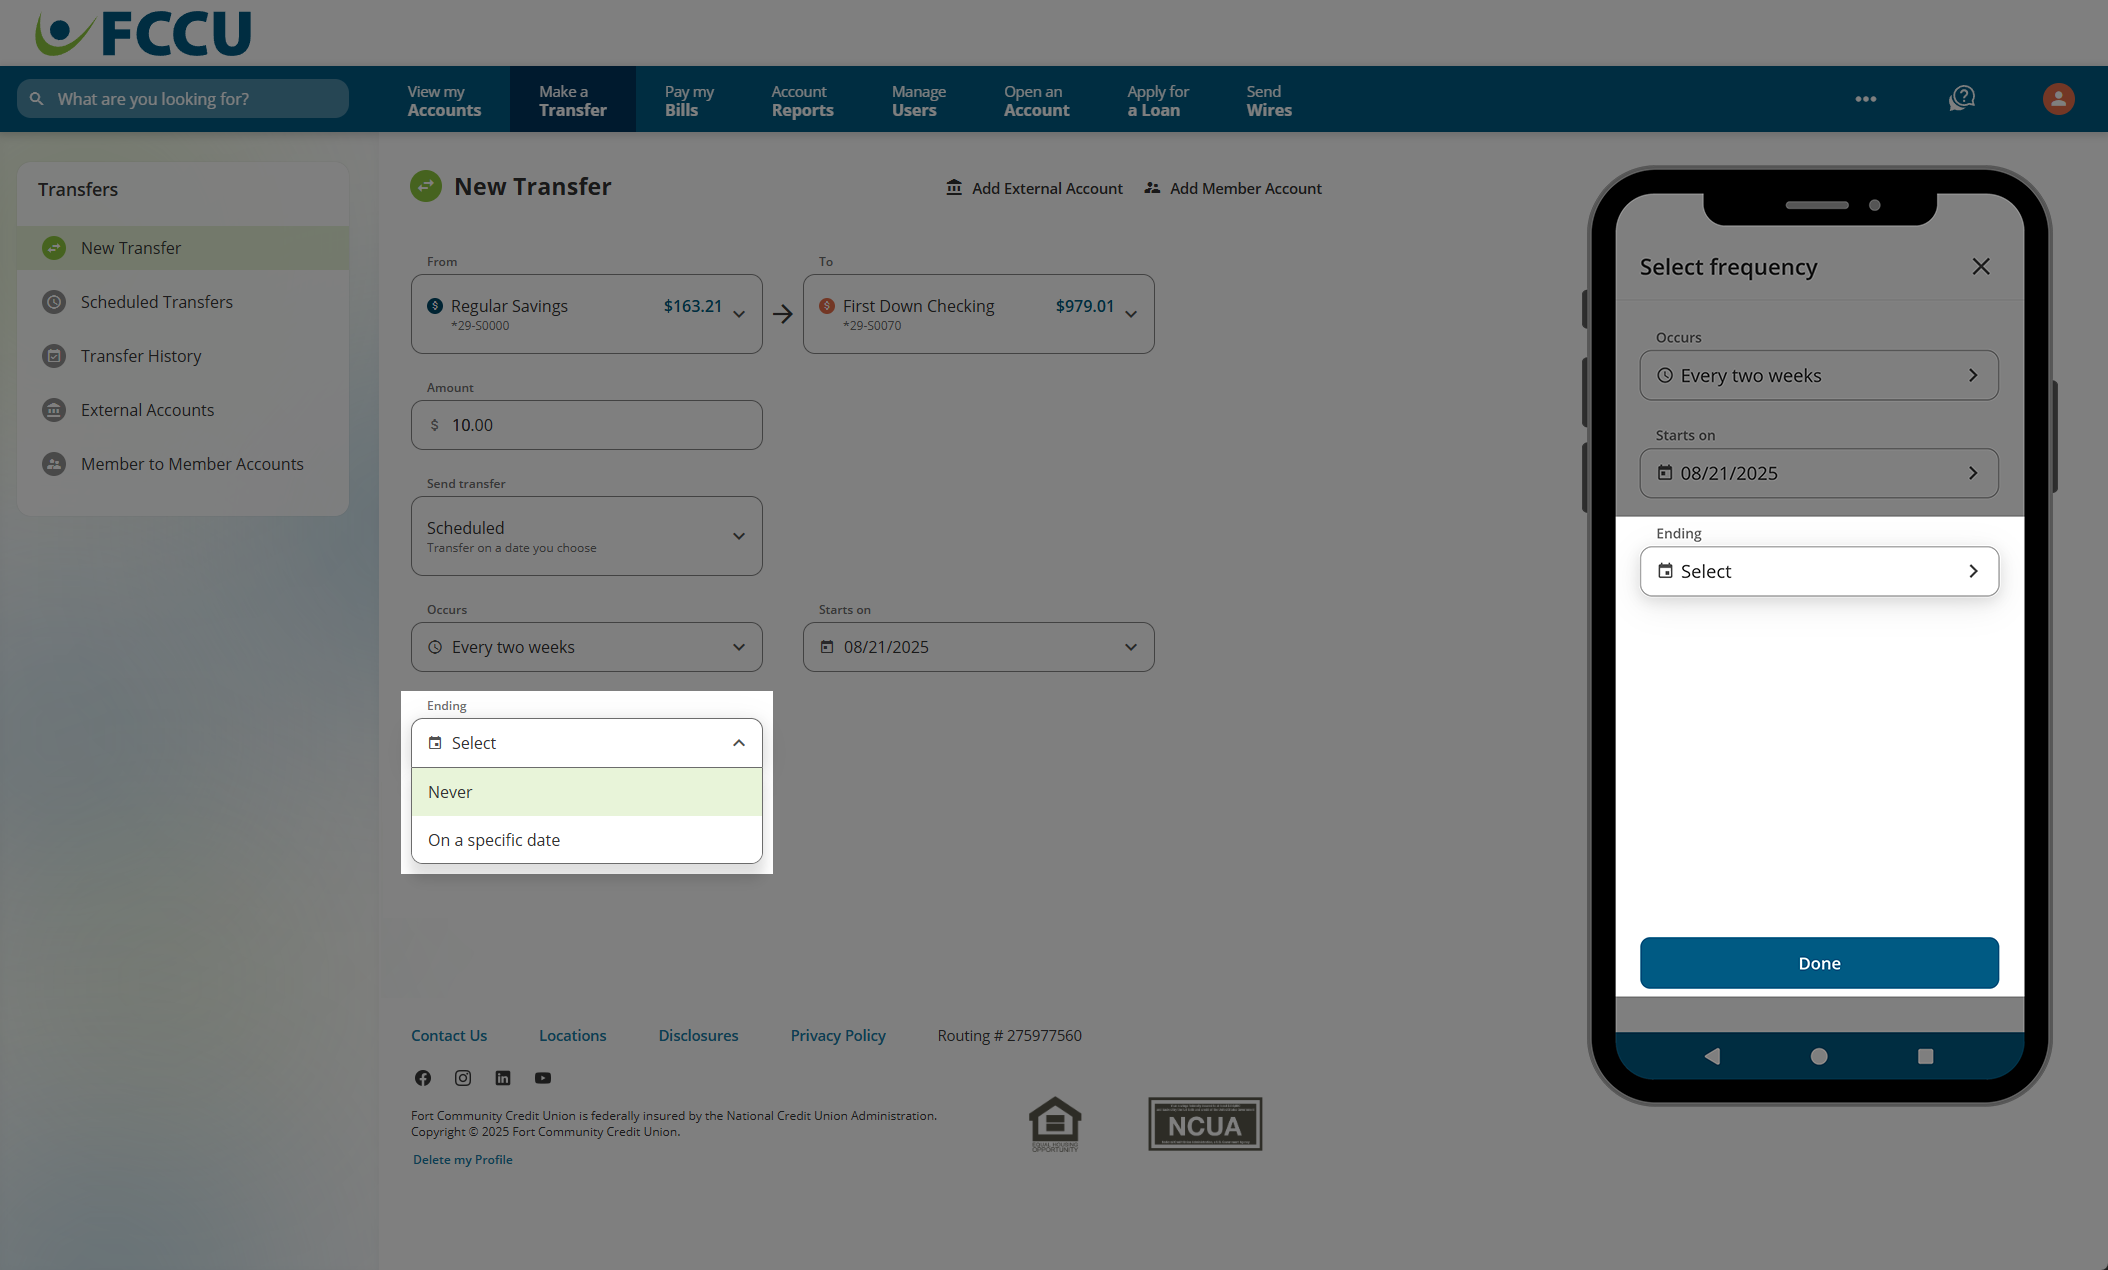
- In the Ending dropdown menu...
- Select Never if you'd like this transfer to recur (repeat) indefinitely. On the mobile app, tap the Done button.
- Select On a specific date if you'd like this transfer to end on a specific date.
- The Ends on dropdown menu will appear.
- Click the Ends on dropdown menu, and use the calendar to select your desired end date.
- On the mobile app, tap the Done button.
- Click the Review button.
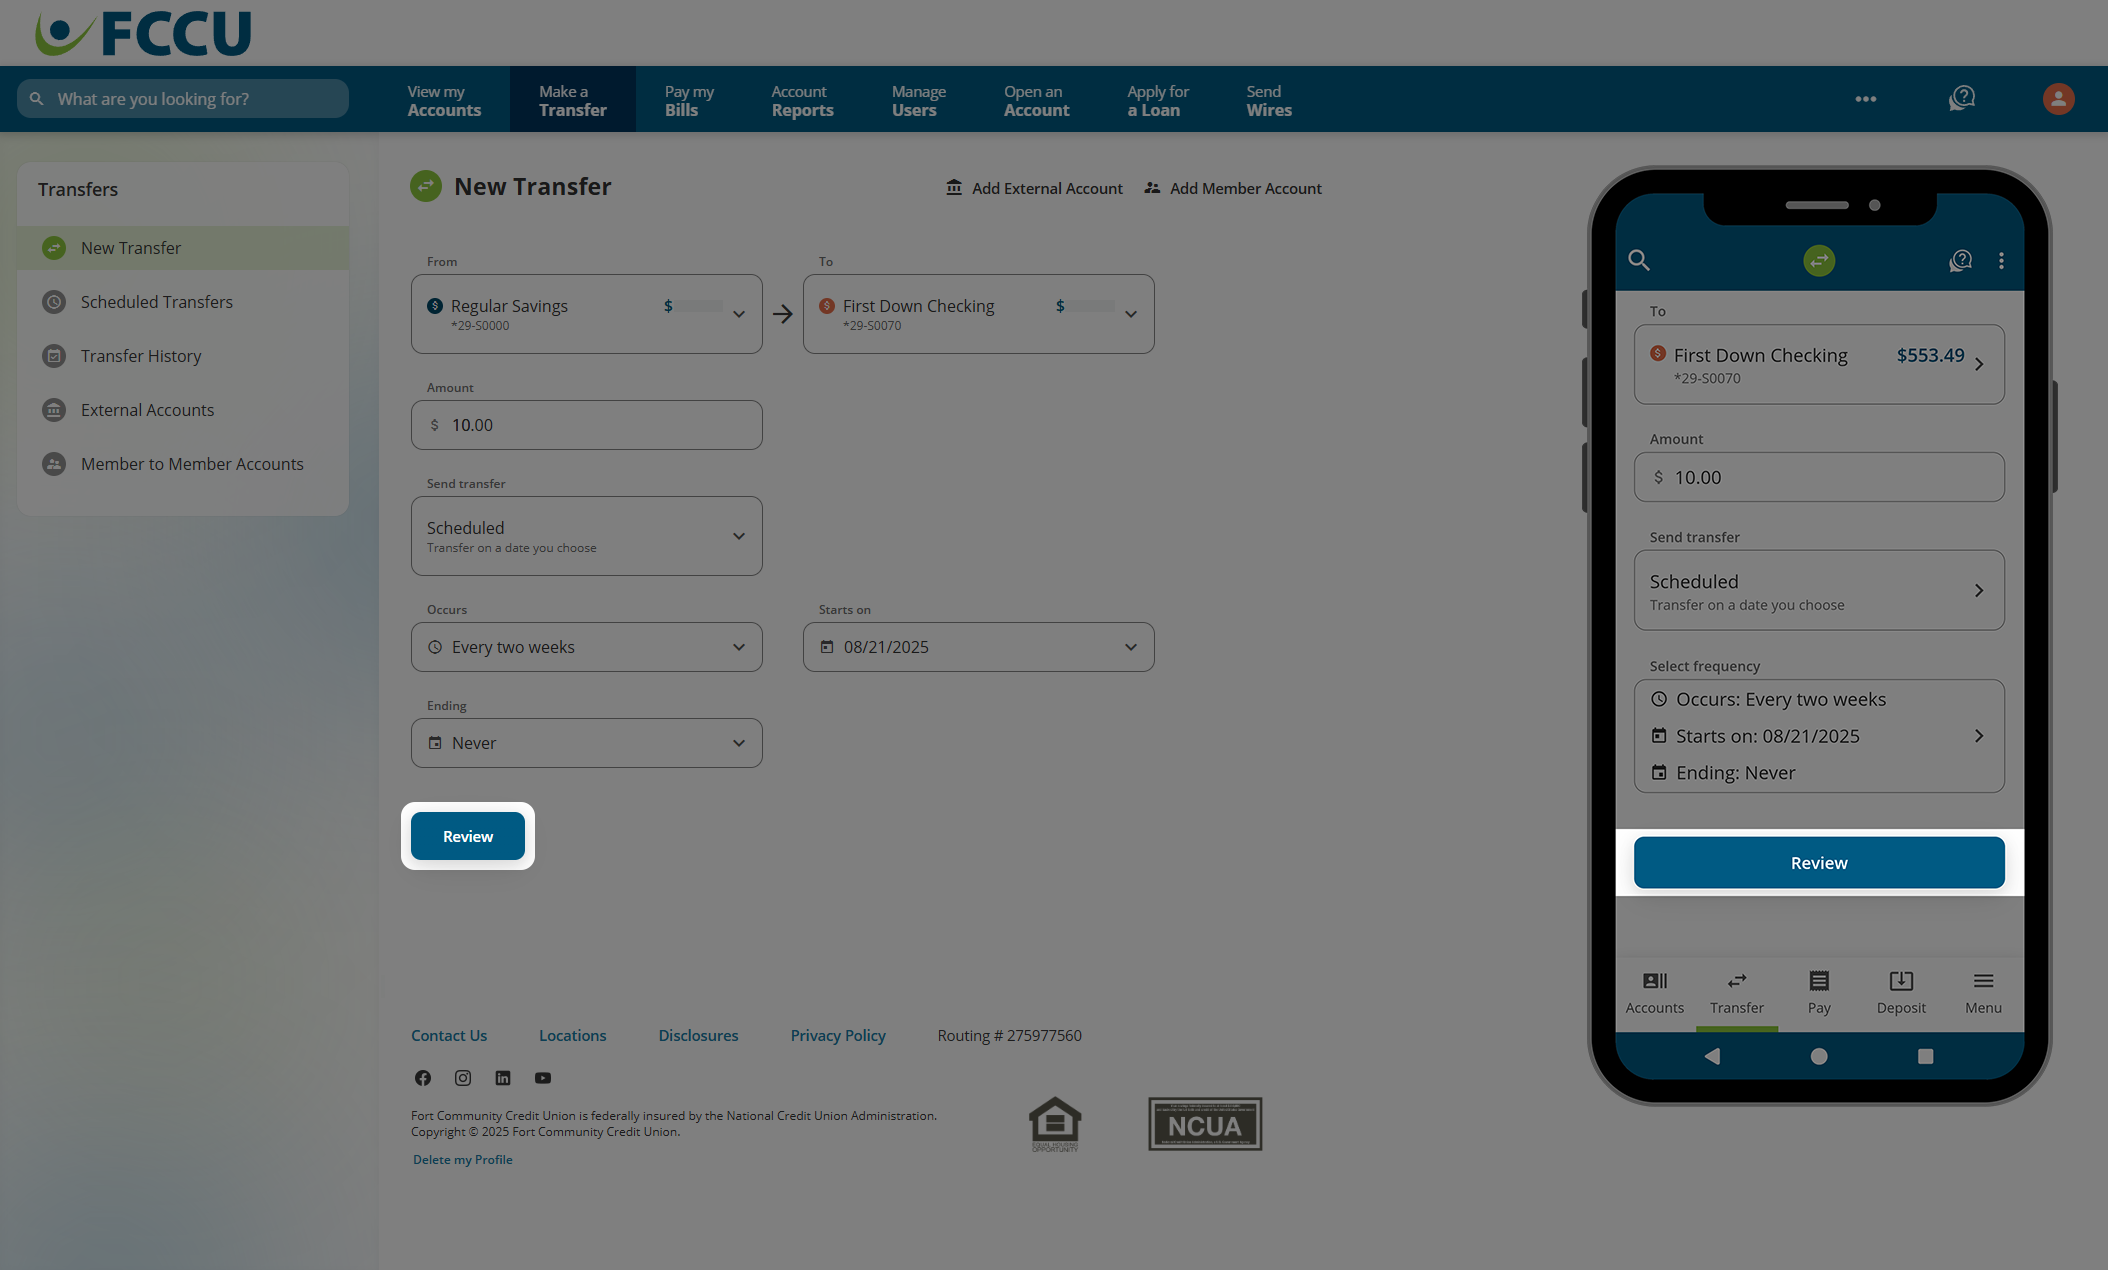
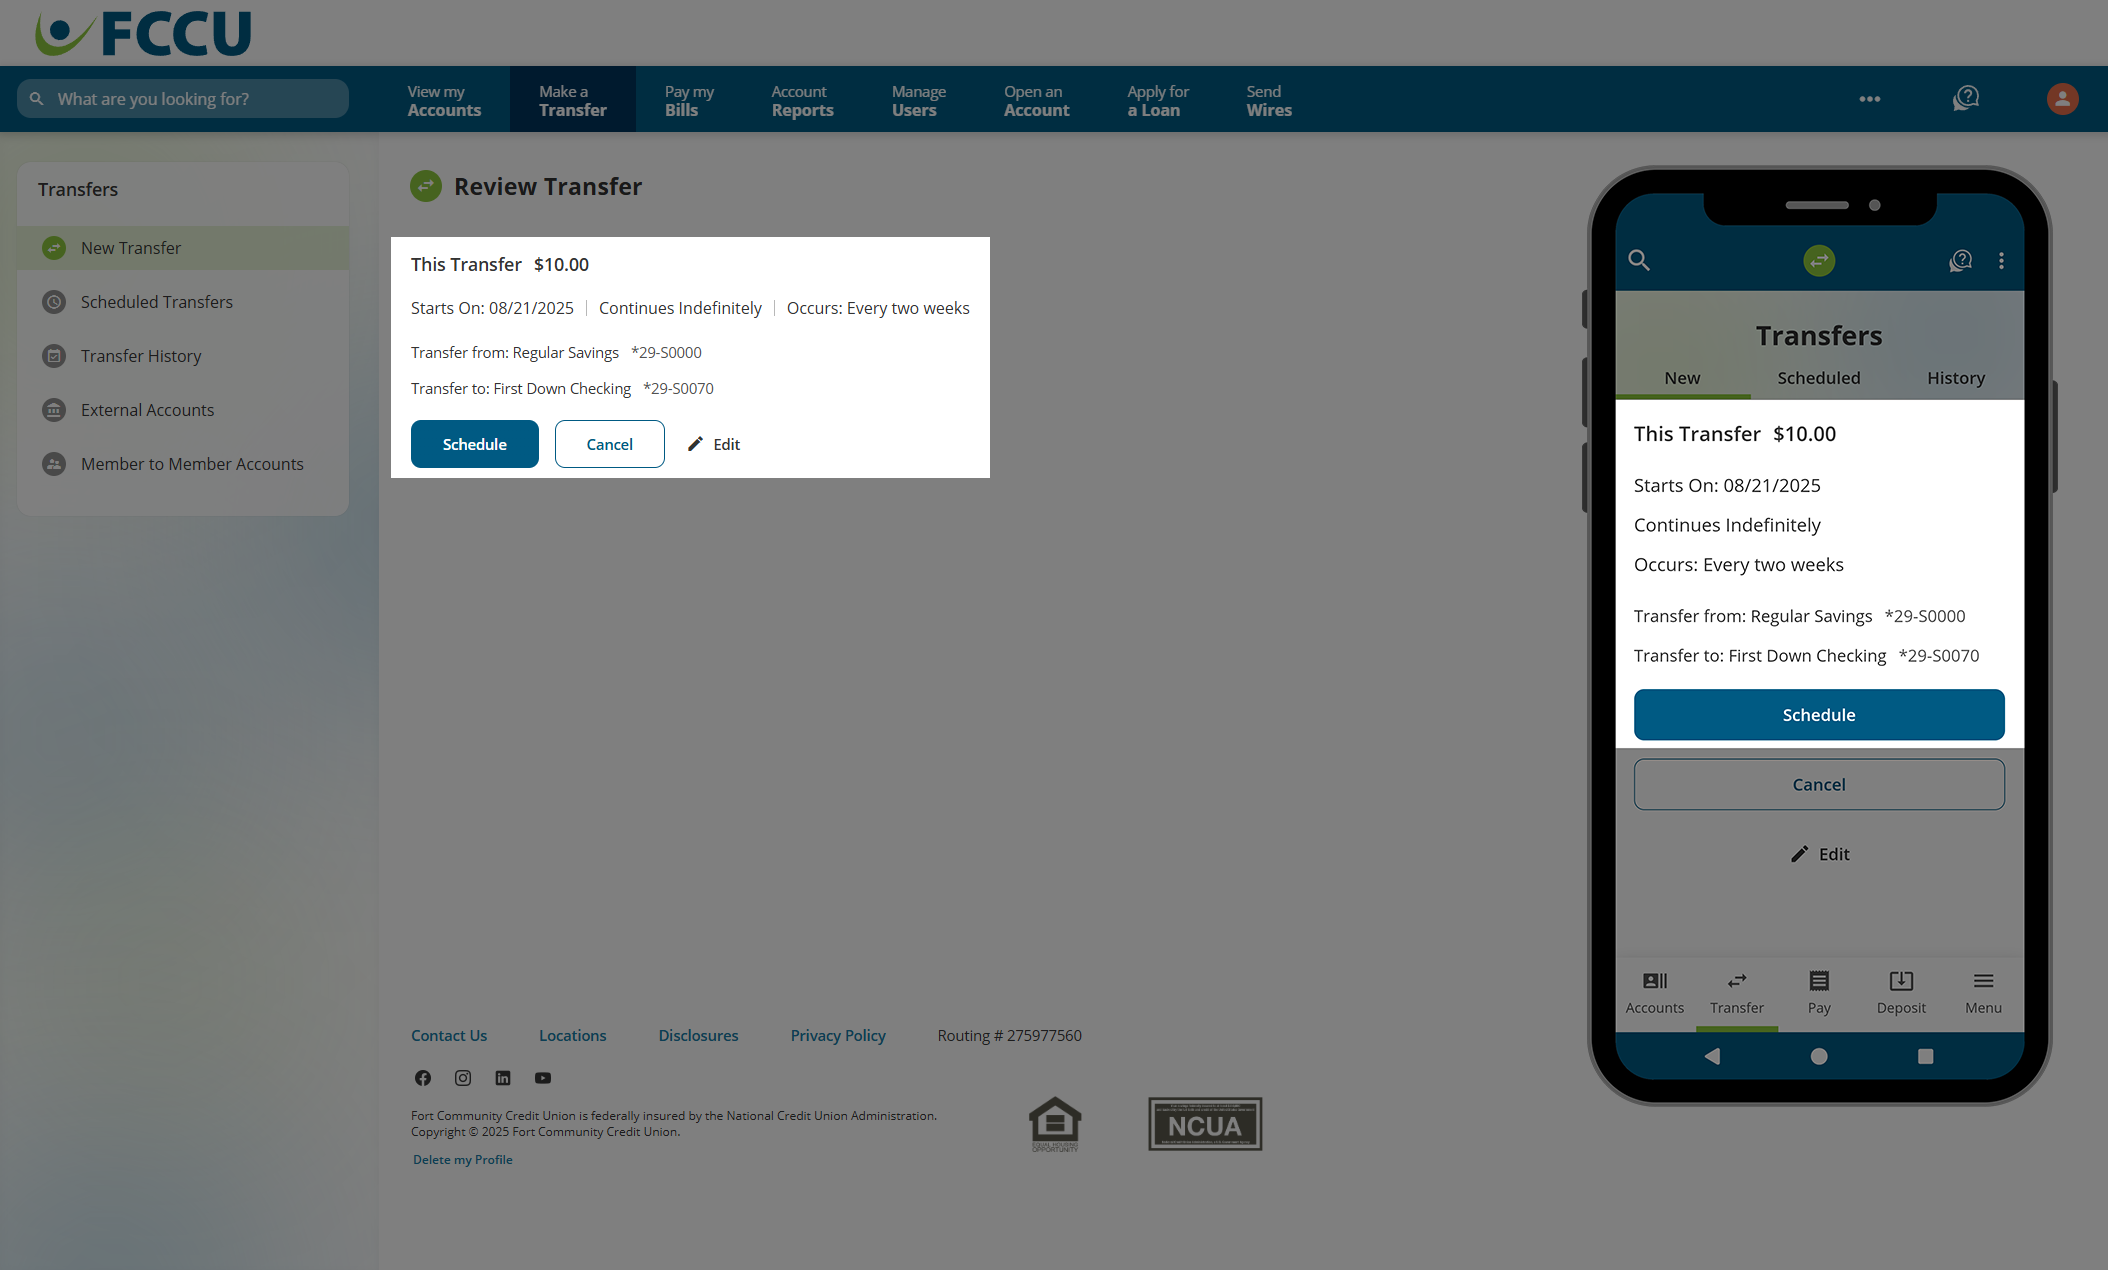
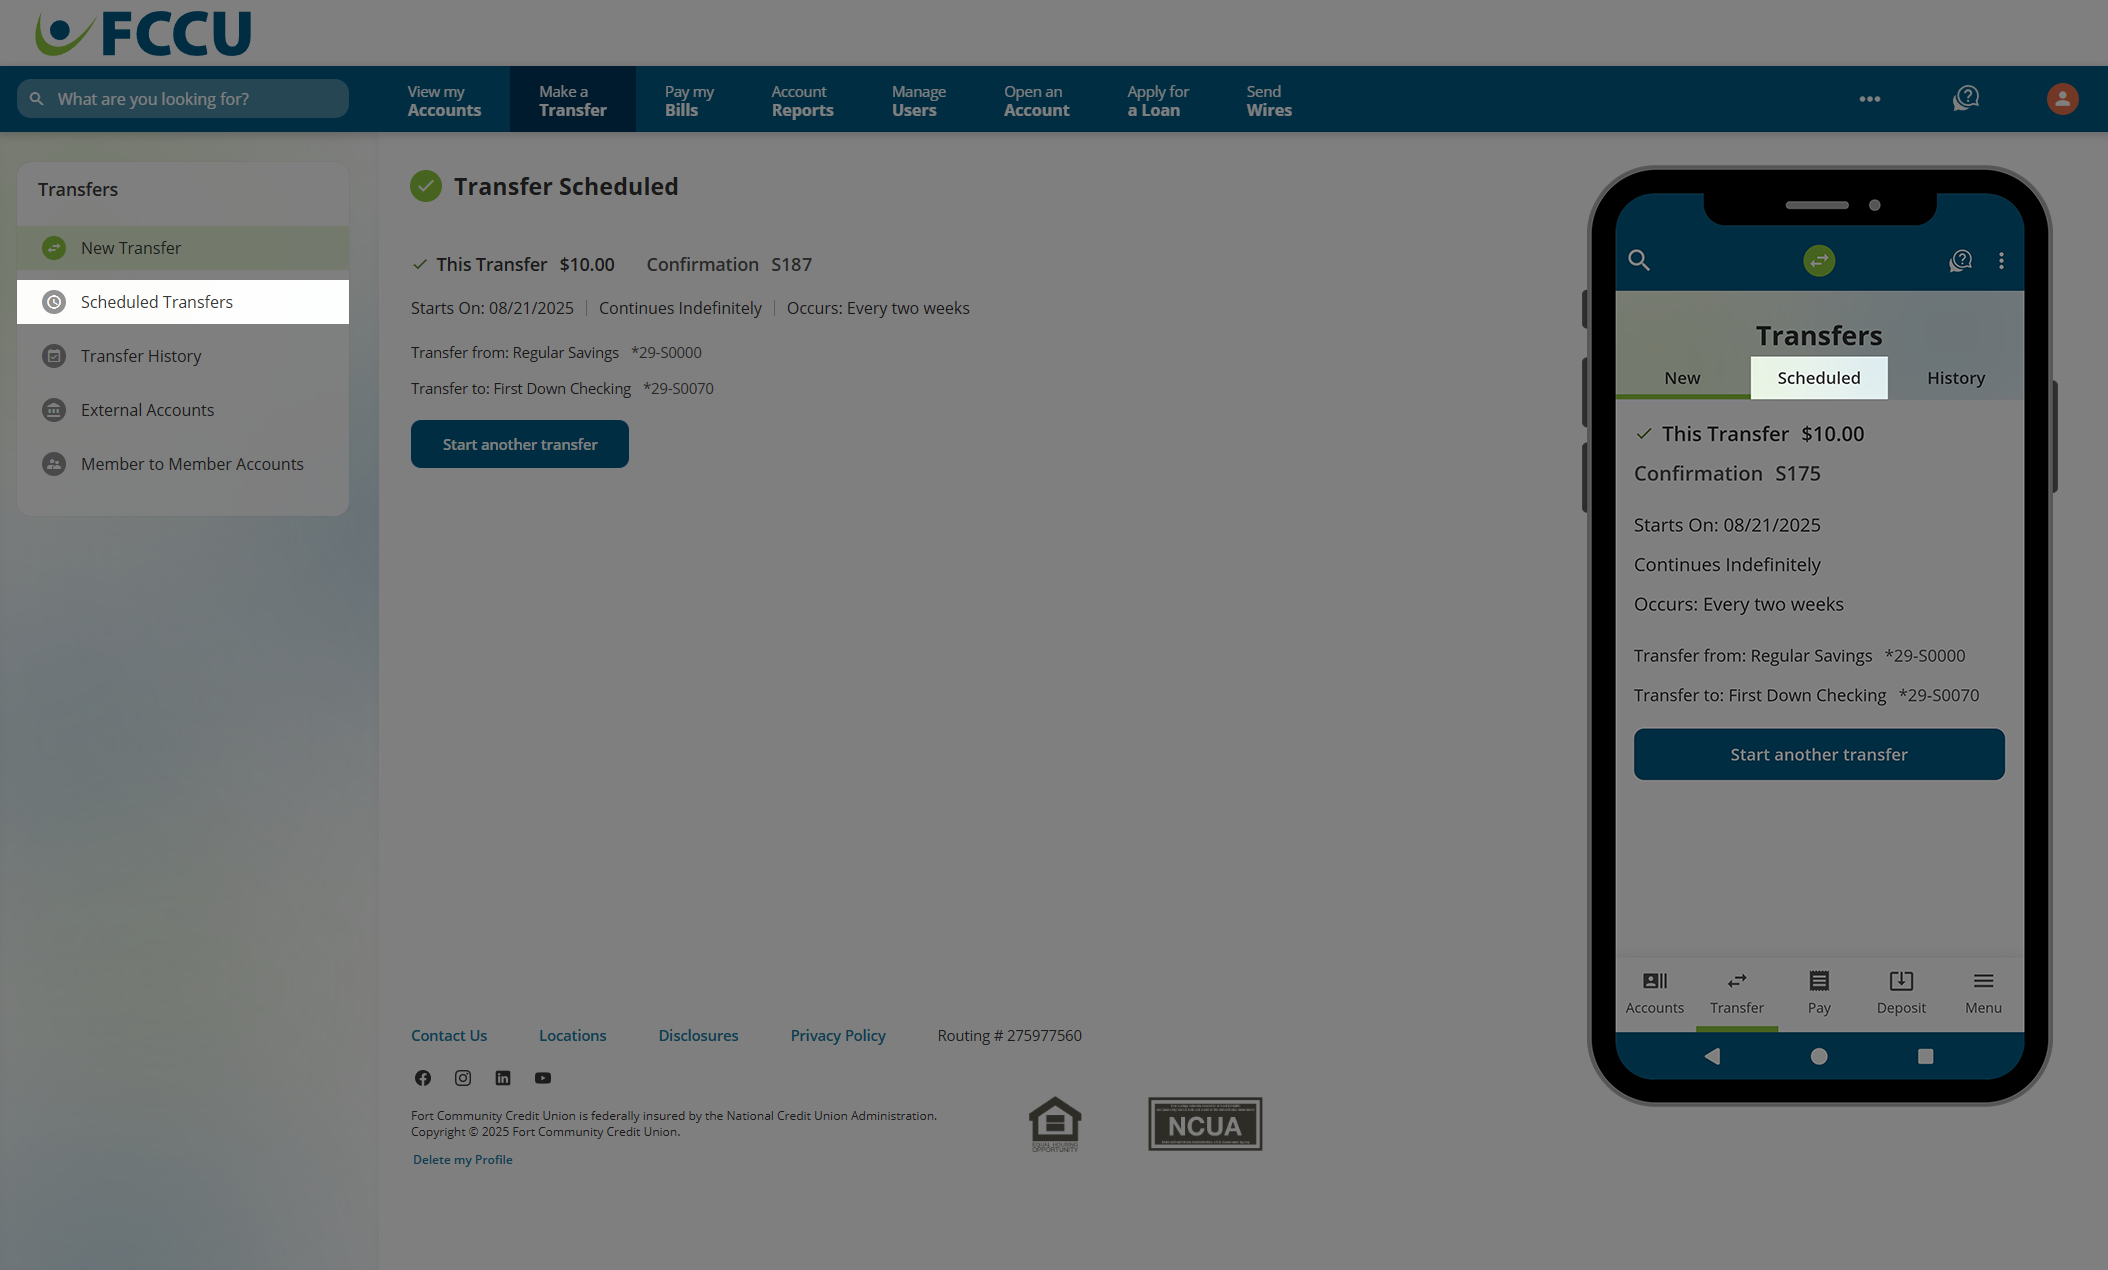
- Review the details of your transfer. If everything looks good, click the Schedule button.
- Your transfer has now been scheduled! You will be redirected to a transfer confirmation page.
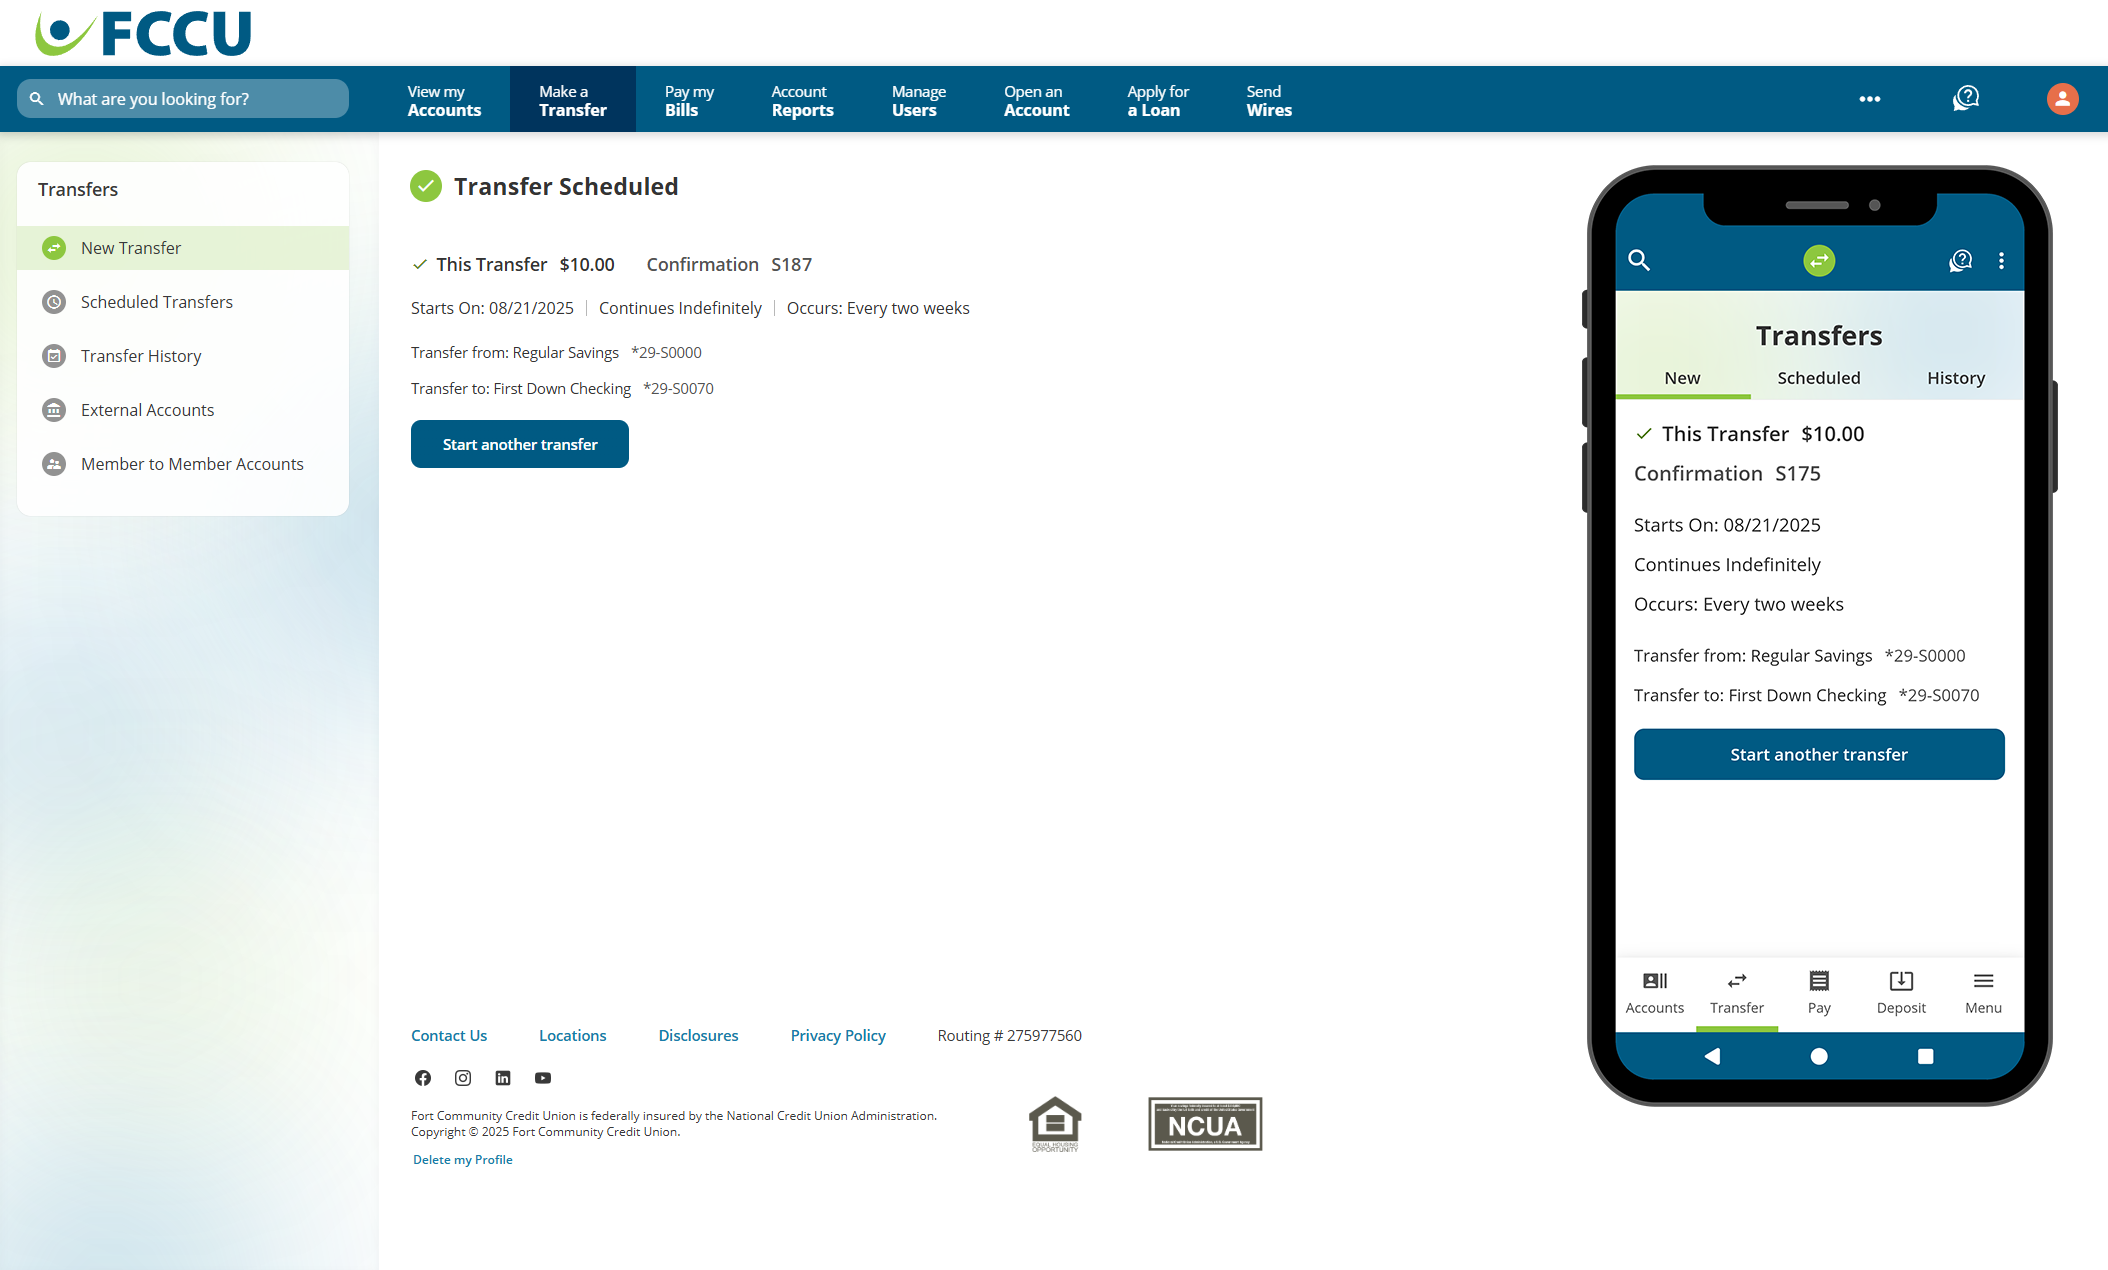
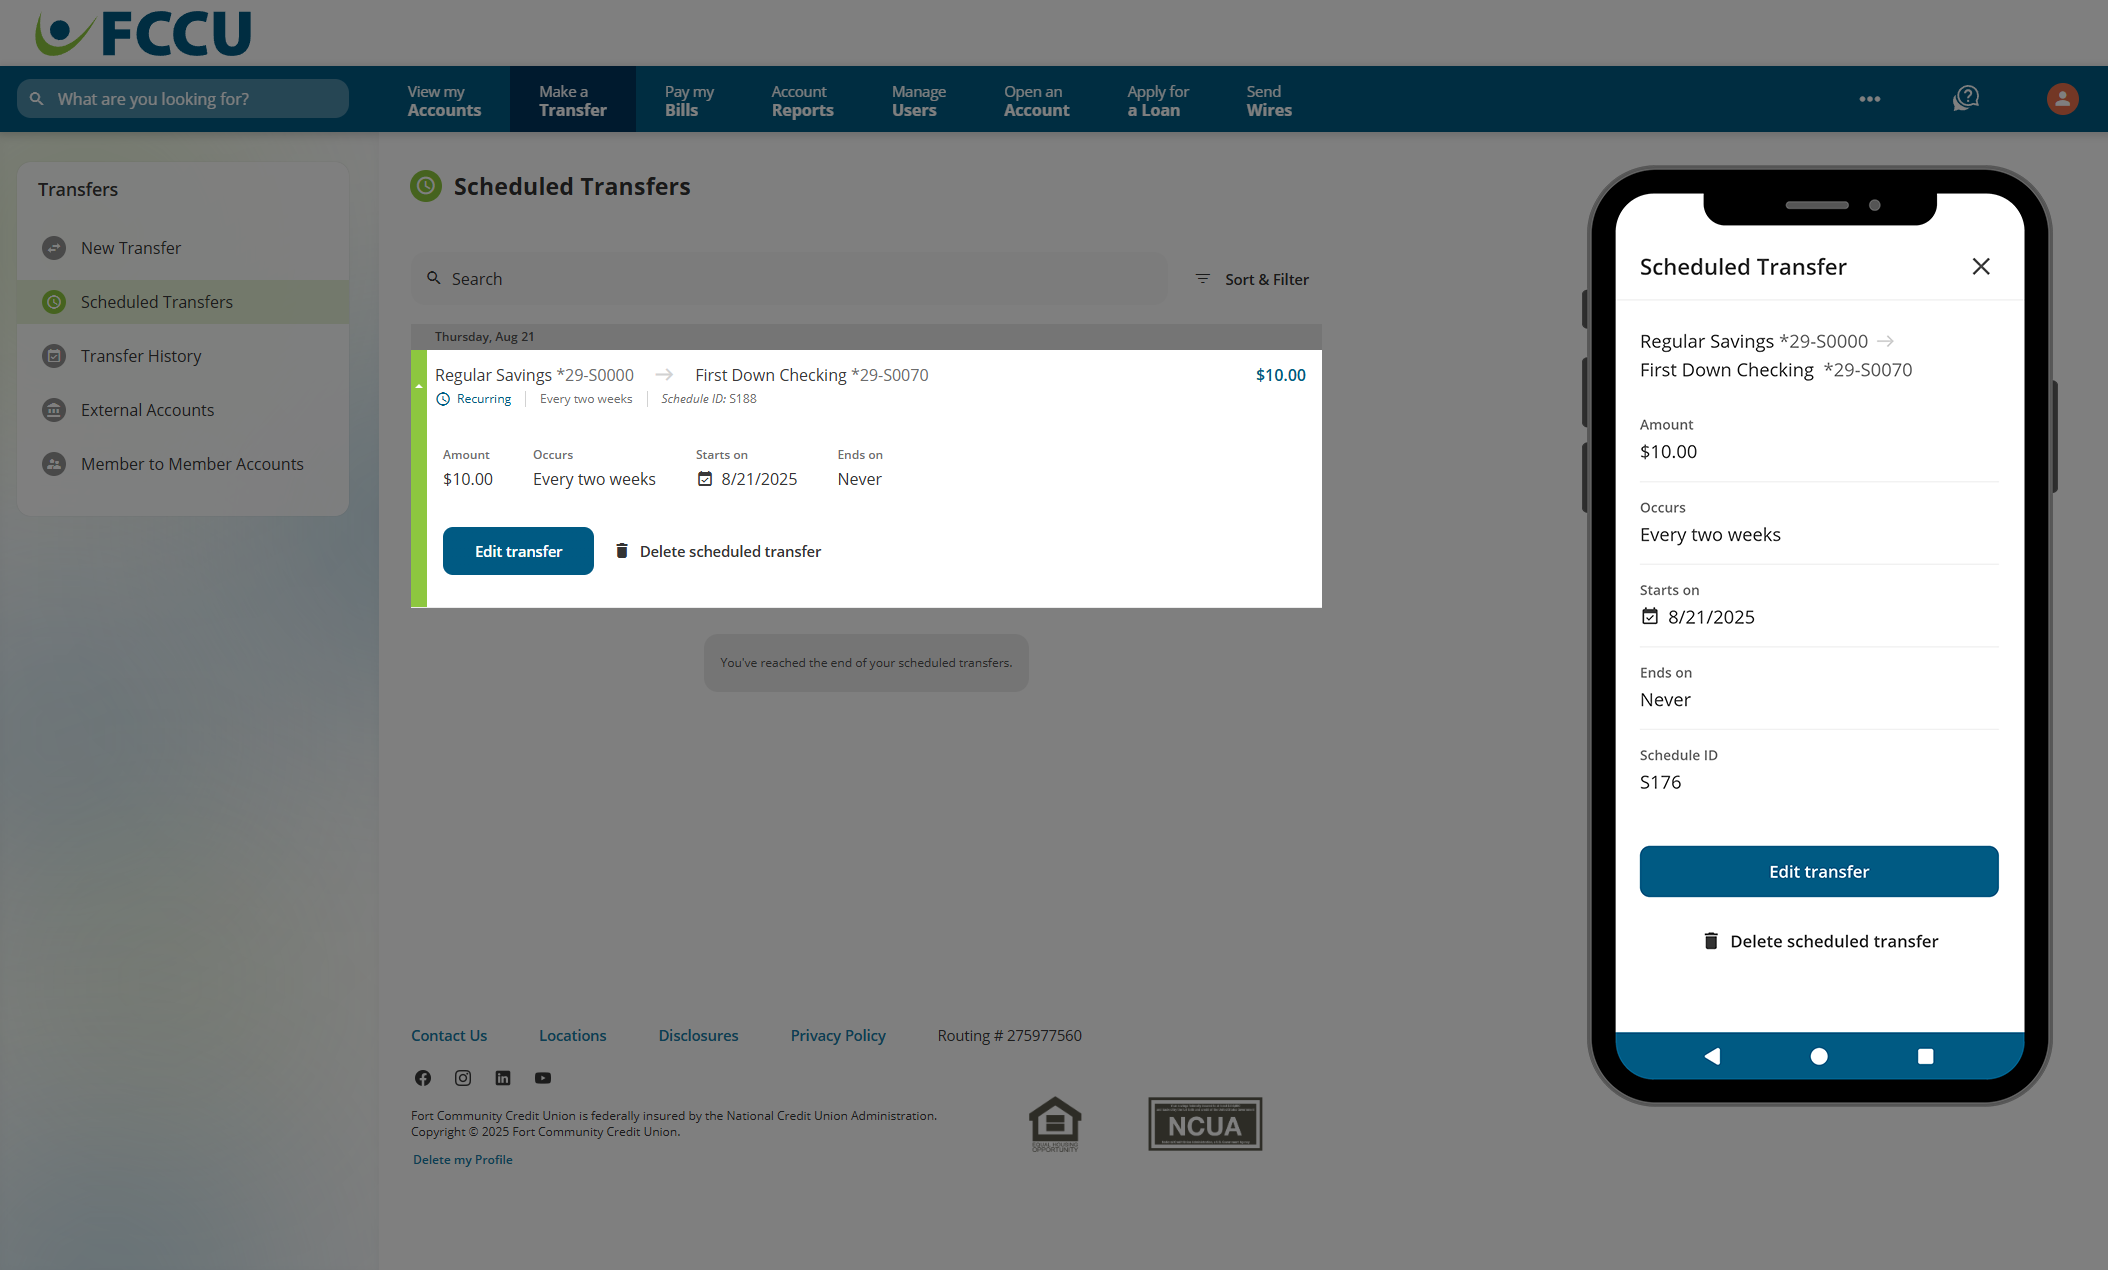
- To manage scheduled transfers, click the Scheduled Transfers menu option. On the mobile app, tap the Scheduled tab.
- Click on the scheduled transfer to expand it and view additional details.
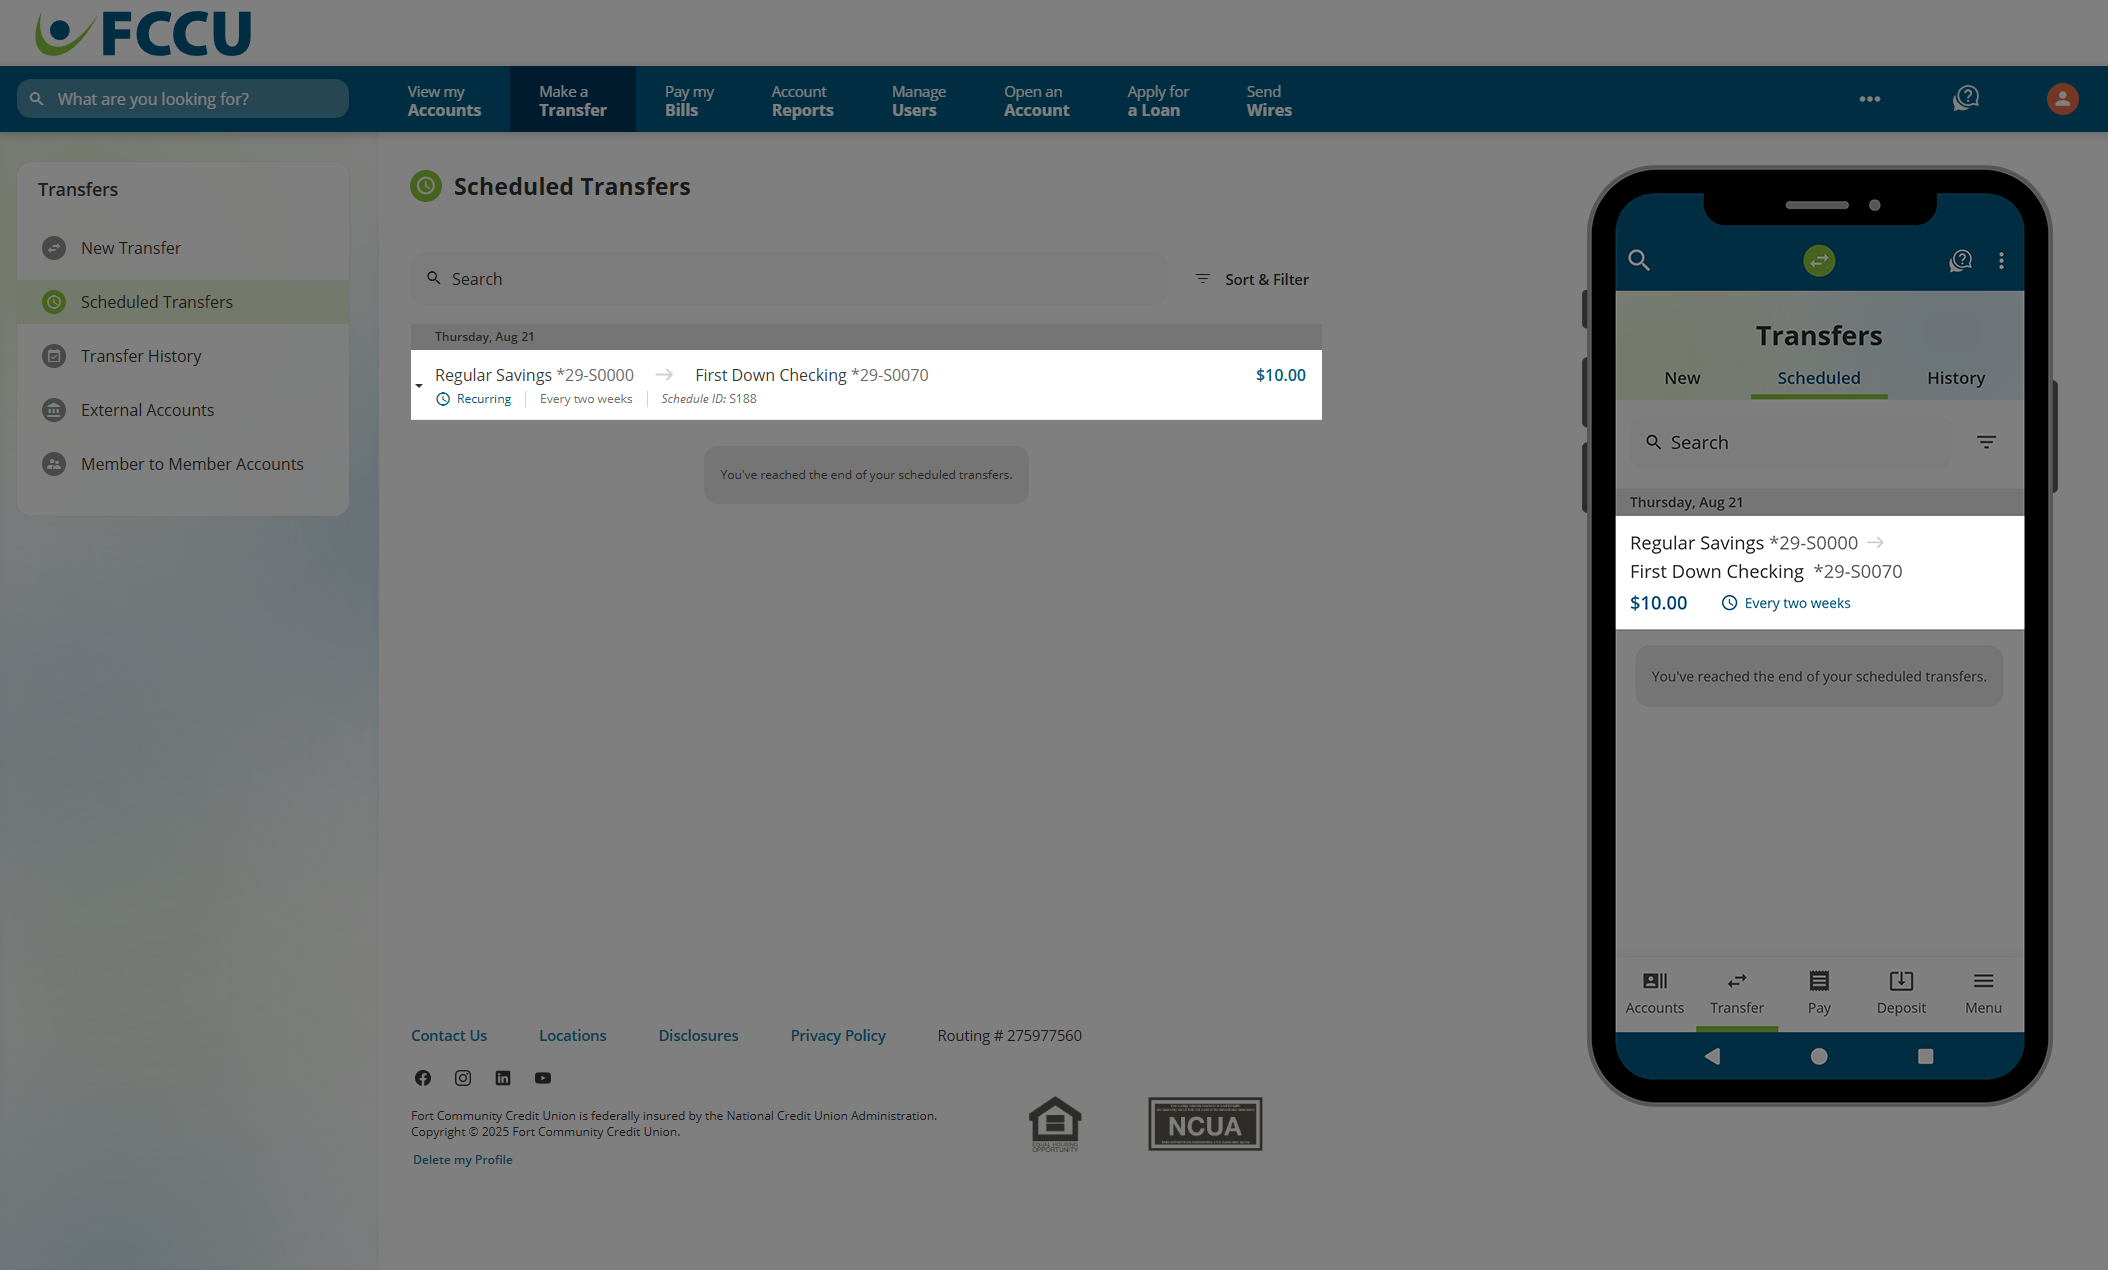
Here, you can edit or delete the scheduled transfer by clicking the corresponding buttons.